
Obviously I've been a bit remiss updating this over the Christmas break for which I can only apologise. If its any consolation the R&R did me some good and I managed to get a fair bit done and off the painting table! This does mean I've managed to build up a backlog of stuff to cover so I should be able to get updates out weekly for a few weeks at any rate!
Secondly, a big thanks to the guys over at All Along the Watch Tower. Matt, Mike and Karol (with guest star Soya) have got off to a cracking start and were kind enough to stroke my ego in the second half of the latest episode. The 6mm DPM guide will be coming soon!
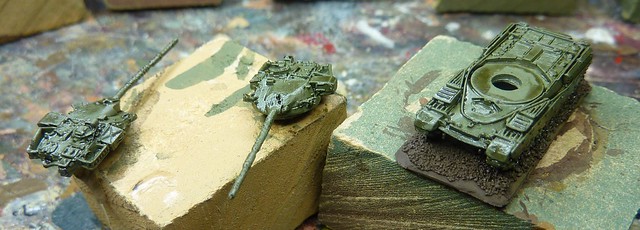
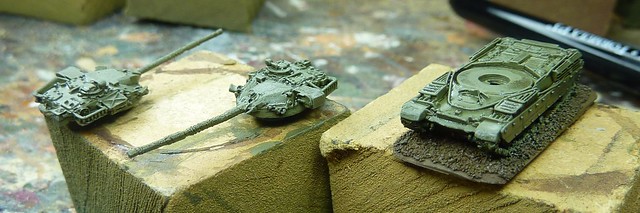
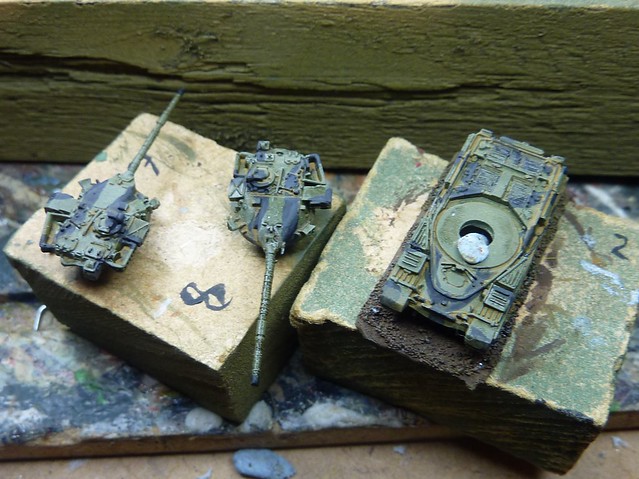
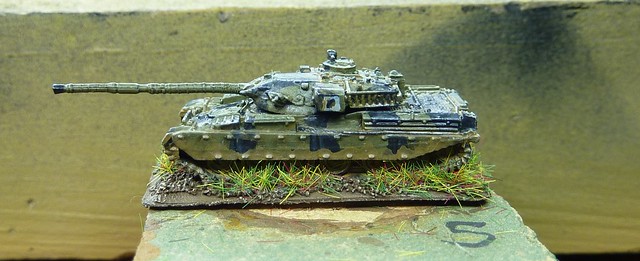
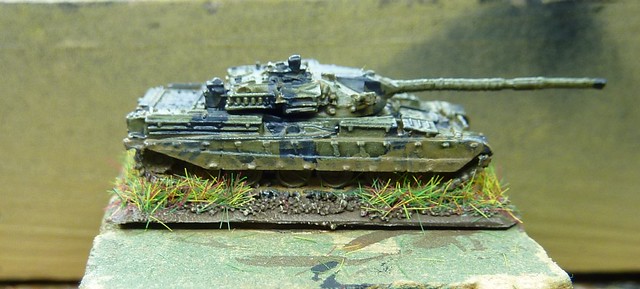
Okay, onto business. I went into some detail on painting British Armour on the last post "Small Scorpions are the Deadly Ones". This update concentrates on the Chieftain Squadron (yep, twelve tanks) which were painted with much the same technique. Rather than repeat that ground I'm just going to concentrate on the stuff I did differently and features unique to the Chieftain.
Research
I pretty much hit up the same sources as used for the Scorpion (Armoured Acorn, etc) along with a few extra. Firstly George Forty's book "Chieftain" dating back to 1979 and personally stolen from my dad's collection! This book covers the Chieftain up to that point (Mk7) and has some colour stills. Its main feature is some detail shots of the commander cupola and rear hull which helped get the detail right.
Secondly, the website 'Chieftain Tank' has some useful photos of preserved examples.
Finally, I had a Primary Source! My Dad served in 3RTR during the period we are wargaming and spent his entire career in one of the beasts (well, excepting a UN tour in a ferret recce car and the obligatory 'troubles'). The GHQ model is sufficiently detailed that, having the folks staying with me and not wanting to waste an opportunity, giving one to him spurred on an evenings worth of data (to the cost of an evening's painting) that proved very useful.
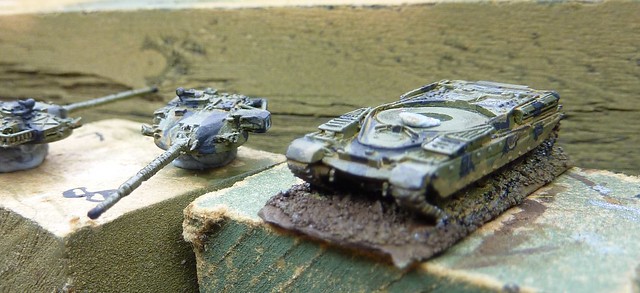
The choice of a British Army for CWC was pretty much spurred on by the family background and the fact that I was born and lived in Germany for the period we are wargaming. Having grown up around the Chieftain it was hard NOT to want to buy as many as the army list permitted. The GHQ model is, except for an annoyingly intrusive mould line on the bazooka plates, a superb model with a crazy amount of detail for a 6mm figure. Although pricey, there was no way I wanted to skip on quality for these beasts. I'll be doing a review for Soya's Mighty Miniatures blog shortly.
At the end of the research stage I had a good idea of the camo scheme I wanted to use and the detail I wanted to paint.
Basing, Undercoating, Washing and Highlights
This was pretty much as covered last post on the Scorps. Army Painter's FOW spray 'British Armour' gave me a good base which was then liberally covered in Vallejo 'Black' and 'Brown' shade wash in a 50:50 slightly thinned mix. I was working on all twelve tanks at the same time.
Post Wash
The Chieftains were then given a heavy drybrush of 'Russian Uniform'. Unlike the Scorpions, I followed this with a lighter drybrush of 'Green Grey' as 'Yellow Green' was far too yellow on the Scorps.
Post Grey-Green Drybrush
Camouflage
Yes, I'll spare you the 'Camouflage' music video this time...
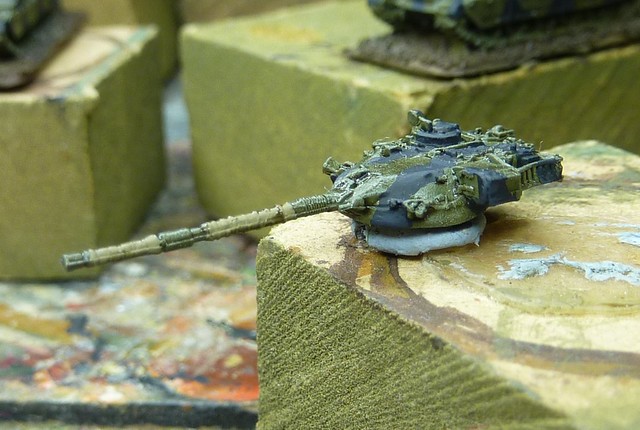
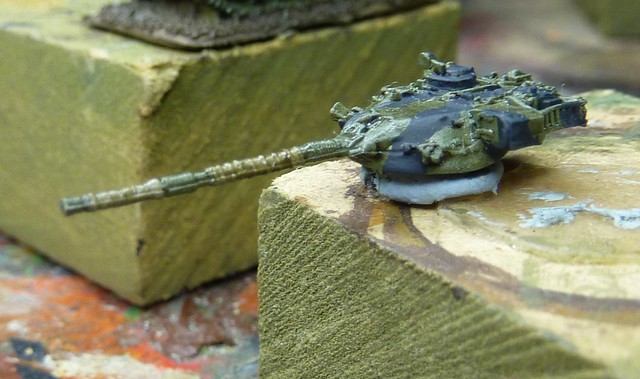
I found German Grey to be far too grey on the Scorpions so this time I used a 50:50 mix of 'Black' and 'German Grey', thinned down about 40-50% as Vallejo paints always should be. I applied this in broad stripes, trying to follow the reference photo I had chosen. I also tried to keep the scheme more or less the same from tank to tank and basically positioned the first four completed tanks to allow me an all round view to make the next eight easier and quicker to paint.
To finish the camo off, I used thinned down German Grey to wet paint on an edge highlight. Drybrushing would be very hard to do with the thin strips without overlapping onto the surrounding green.
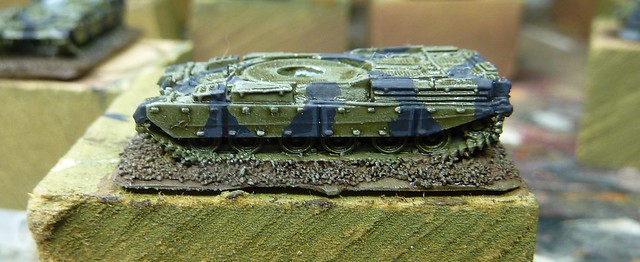
Camouflage, highlight
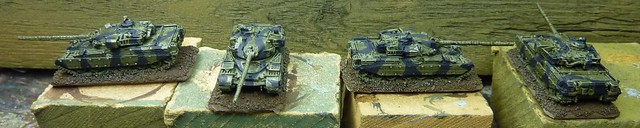
Four Way View (probably best to go to Flikr and select the 'large size')
Fine Detail
(or how Dad only told me the thermal sleeve was wrong after the first three tanks were done)
Before getting onto the fine detail there was some block detail still let to do in the form of the Thermal Sleeve. Designed to stop the barrel from warping if one side is cooled by rain or wind, the sleeve is a distinctive feature of the Chieftain and the colour photos in 'Chieftain' made it look like a Khahki colour. As such I carefully painted 'Khaki' on the barrels, being sure to leave the fume extractor and tip in green.
Thermal Sleeve Base Coat
After doing the first three tanks, Dad stuck his head in, looked at the tanks, and promptly told me that on later tanks (i.e. when he was in and therefore my time period) the sleeves were almost always painted over and camouflaged like the rest of the tank. Cheers! Wonderful timing as always.
I decided to finish the three 'incorrect' tanks off, if only to help anyone doing a sixties CWC army. I gave the sleeve a brown/black wash and, when dry, followed this with Khaki then 'German Camo, Beige' highlights to bring out the detail.
Thermal Sleeve Highlight and Wash

Turret Black Detail
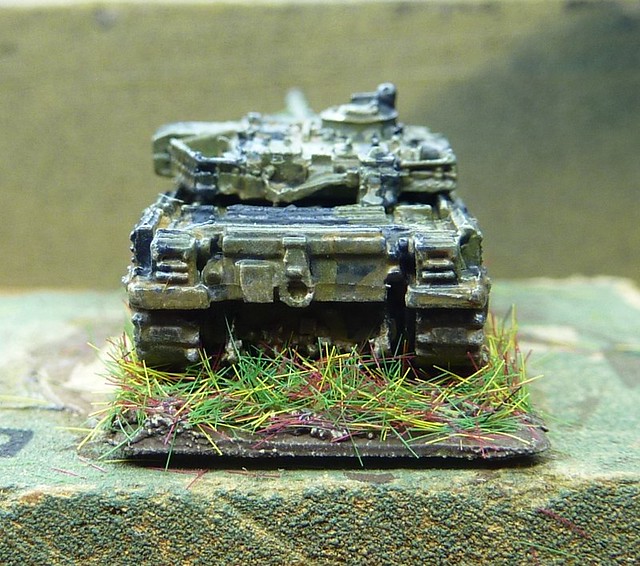
Hull Black Detail
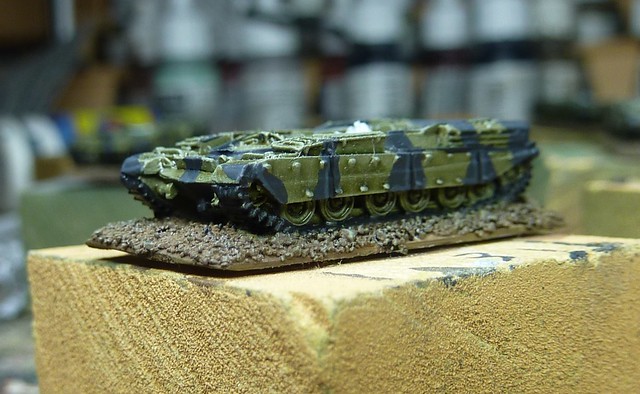
As with the Scorpions. I painted a black rectangle (more of a brushstroke) on each vision block. Considering some don't even bother doing this on 28mm 40K kits, this level of crazy detail is becoming my signature piece at the club! I also added a larger black rectangle on the fornt and rear hull for the registration number.
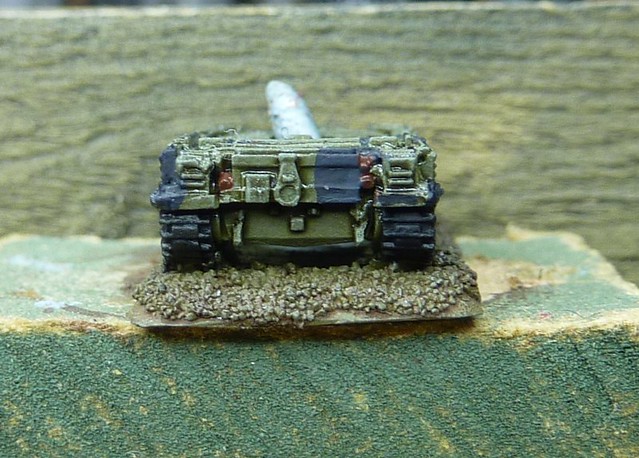
I returned to the exhausts. A Chieftain has three. One large one each side of the rear hull and a smaller one for the AGU (Auxiliary Generator Unit, a small engine that provides system power when the main engine isn't on). These seemed to either be painted the same as the hull or a dull brown colour (probably a red oxide anti-rust finish). I decided to paint them as the latter just to bring a bit of extra detail out. To do this I painted them 'Flat Brown'.
Exhaust Detail and Registration Plate (Right Mud Guard). I didn't realise the rear mould line was so prominent until I did the photos. Sigh.
Next I used 'Gun Metal' paint to pick out the tracks, tow lines and co-axial gun. I then, very carefully ran the edge of a paintbrush dipped in 'Oily Steel' over the tow line and co-axial gun to highlight. I then painted in the black circle of the Commander's searchlight with Oily Steel to represent the search light reflector.
Finally I went over the metal and exhaust areas with 'black shade' to add some instant black lining.
Finally I went over the metal and exhaust areas with 'black shade' to add some instant black lining.
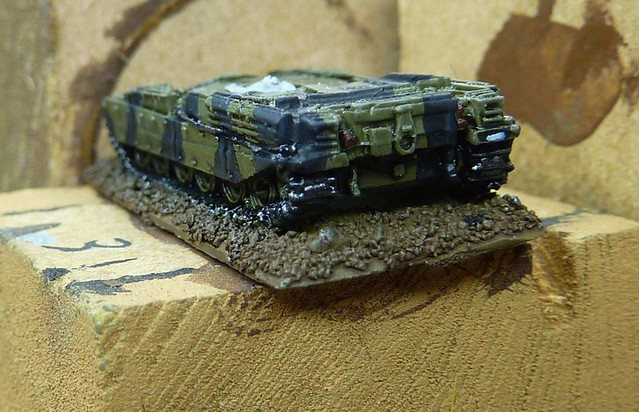
Metal Work (actually taken after doing markings - note Rear Registration Plate)
Markings
Yeah, really. Dad had detailed how the NBC pack of the tank (the box at the back of the turret) had a number painted on it to identify the tank. The first number identifies the Squadron (1 for 'A sqdn', 2 for 'B sqdn' and so on for C and D). The next number identifies the troop (what we call an armoured Platoon). I had already decided that I was going to paint the tanks as 'B Sqdn' so 5th troop (the first troop of B sqdn) would be 21. 6th troop would be 22 and so on. There are three tanks from each troop so the first three would have 21, the next three 22 and so on.
Clear as mud, right?
Additionally, the Main Searchlight housing would also sometimes have a geometric shape as a squadron marking on it. B sqdn used a Square (which I recalled from FoW). These were painted in white.
Using thinned down white paint, I tried to carefully paint the marking on. The square was fairly easy, if a little oversized. The numbering however was a bit of a nightmare. I couldn't seem to get the paint consistency in the sweet pot and the numbering came out blurred. A bit of a shame.
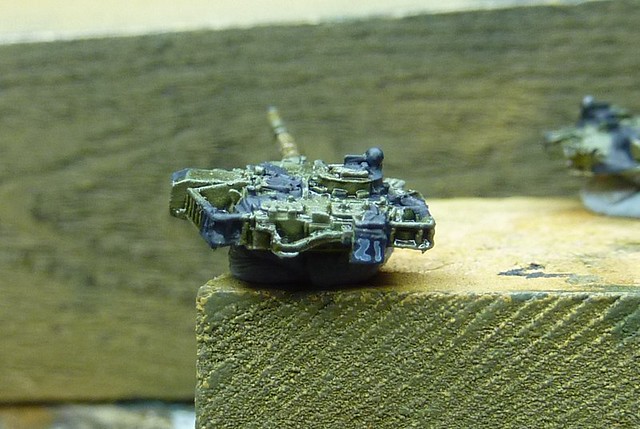
Squadron and Troop Number
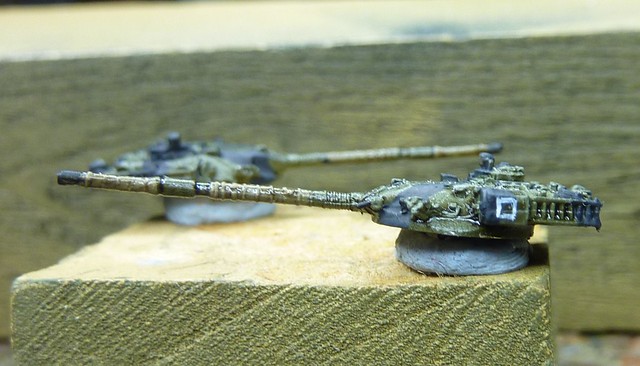
Squadron Marking
I used the white paint to paint a small rectangle within the black rectangle I painted earlier on the hull to represent white text on a black background. Simple but effective.
Finally I painted a small yellow circle on the front hull on the opposite side to the reg plate. This is the bridge marking and is used by MP to ensure that a heavy tank like a Chieftain doesn't destroy a too weak bridge!
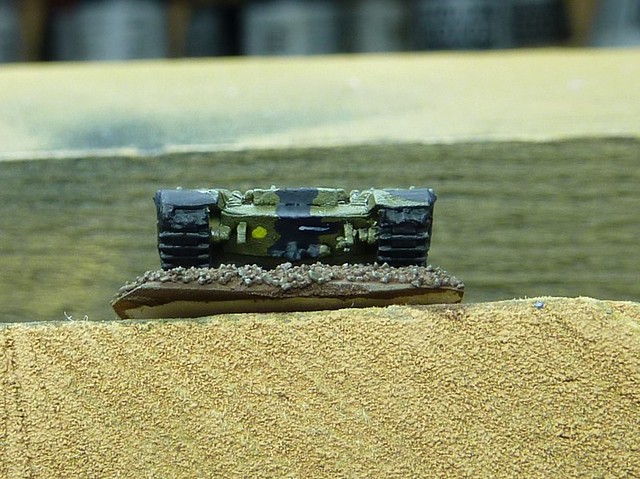
Bridge and Registration Number
Weathering
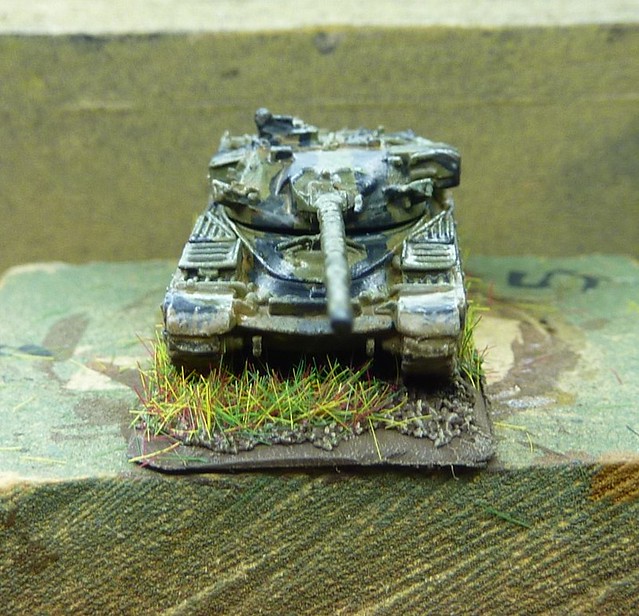
As with the Scorpions, I used thinned down 'US Field Drab' to add a carefully applied 'ingrained dirt' wash to the tracks, lower hull and top surfaces. This included the turret to not only represent the dirt that the crew would bring to the too as they got in, but also the fact that the sloped glacis plate and turret tended to send dirt from a shallow water crossing all over the tank. A Driver could easily find himself swamped if not careful. The lines and detail of the GHQ model really lends itself to this kind of weathering and fine detail, certainly more so than the lack lustre Skytrex Scorpion did.
Dirty Tank
The base was painted as per the Scorpion and static grass added. I used a damp brush to flatten the static grass immediately behind the tracks to reflect the impact that 60 tonnes of steel and ammo has on foliage...
So there we go. Twelve of the finest MBT available to NATO at the time (at least till the Leopard II and M1 Abrams arrive in the early Eighties).
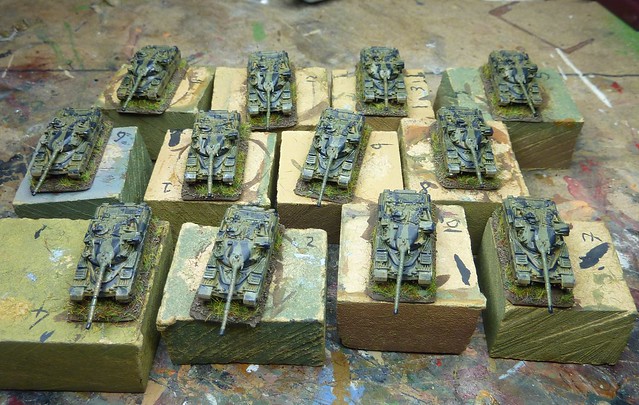
Bravo Squadron, 3RTR forms up
The right hand side mould line is an absolute pain. I'd say its more of a disjoin in the mould as the bottom half sticks out quite far. A Dremel would fix it but the raised areas (which really limit the needle files access) and panel grooves would be destroyed. Detracts from an other wise good model.

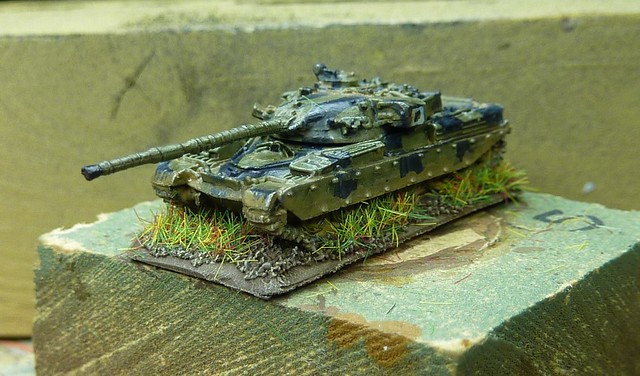
The finished Tank
No comments:
Post a Comment