Showing posts with label Miniatures. Show all posts

Sunday, 11 March 2012

Zimmer-it Up

It's always important to document the heroic failures as well as the successes so this week we'll take a look at an experiment I conducted with applying Zimmerit on 1:100 models.

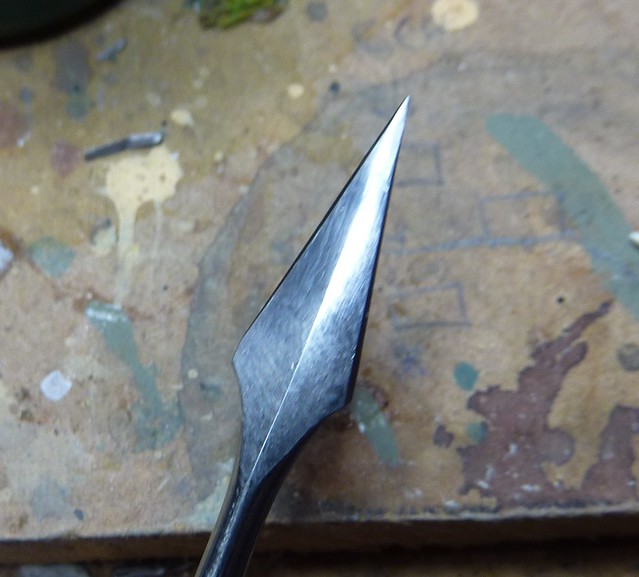
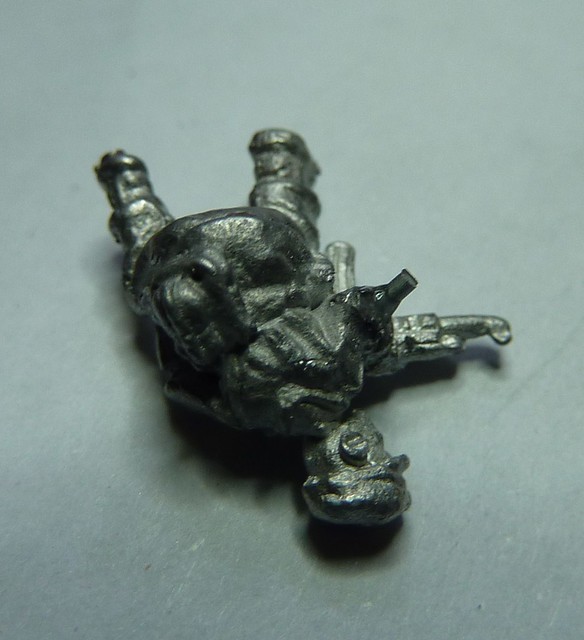
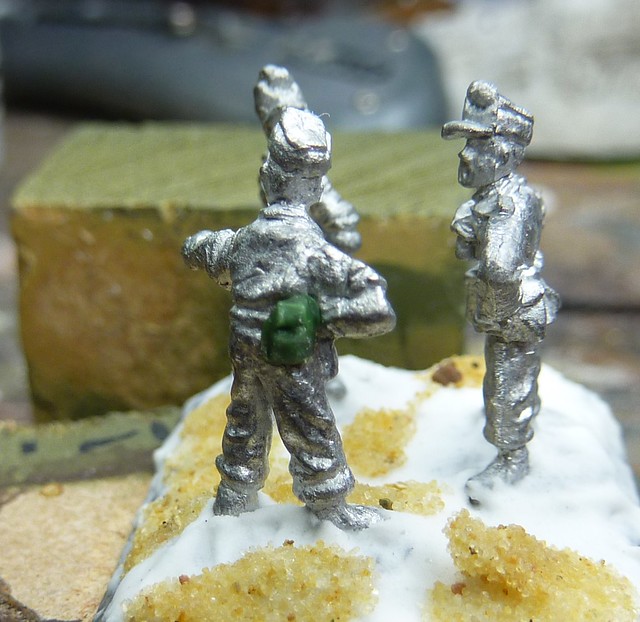
Firstly, what is Zimmerit?  It's an anti-magnetic mine paste that was applied to German tanks.  If you've ever seen a German tank that looks like its got a bad case of cellulite, then that is Zimmerit.  Here's a close-up photo I took of a JagdPanther at the Imperial War Museum, London that features it.
DSC00468
Nothing a bit of moisturiser wouldn't solve.

The paste is not anti-magnetic, it is just non-magnetic.  It provides sufficient stand-off that a hand deployed panzer-knacker magnetic mine can't find purchase and will fall off.  Based on this, the Geramns decided to apply it to all of their front-line tanks from the end of 1943.  There was just one problem...  Only the Germans used magnetic mines.

The Germans had, once again, made a massive assumption that everyone else would follow suite (like heavy tanks).  Sadly the opposition's thought process went more or less like this:

  • USA - Why'd I want to throw the mine when I can launch it on a rocket?
  • Britain - Why'd I want to use a magnet when I can use glu-OH LORD!  IT'S STUCK TO MY LEG!
  • Russia - Why'd I want to use a mine when I can send wave after wave of my own men to use up their ammo?
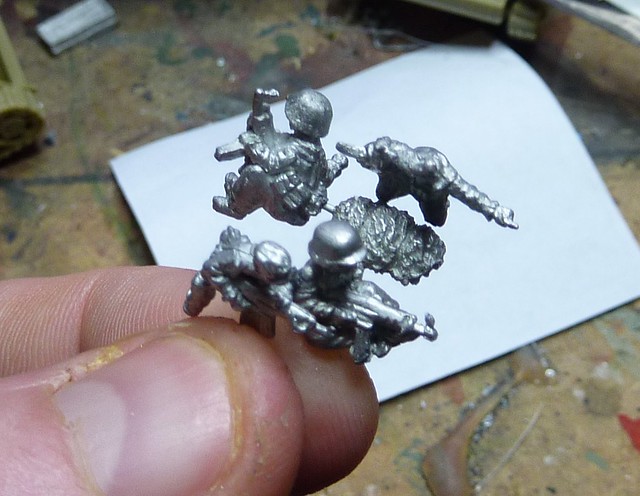
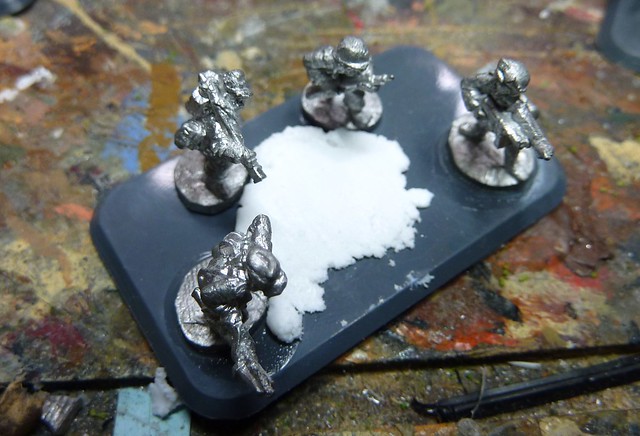
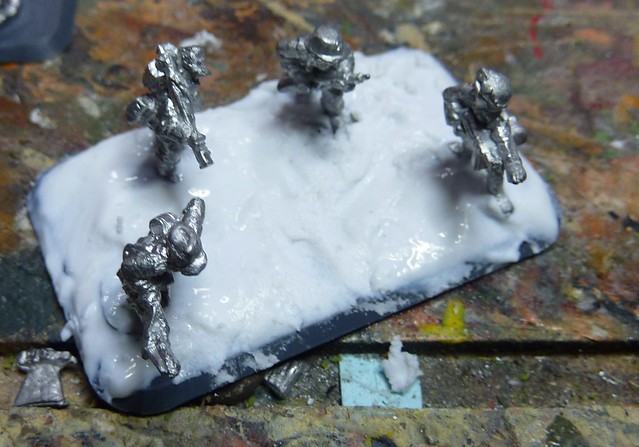
Also, Dog Mines
Combined with a rumour that it caused tanks to catch fire (later disproved) it disappears off German armour production lines in September 1944.  More info can be found here.

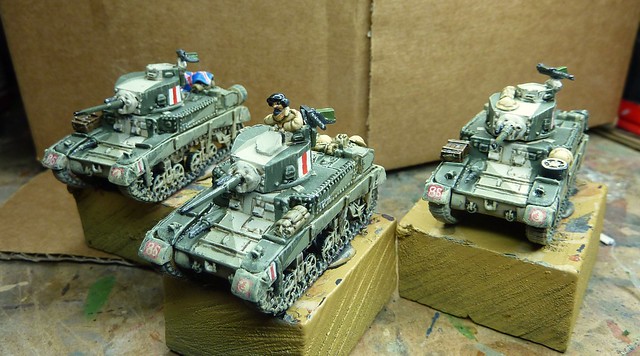
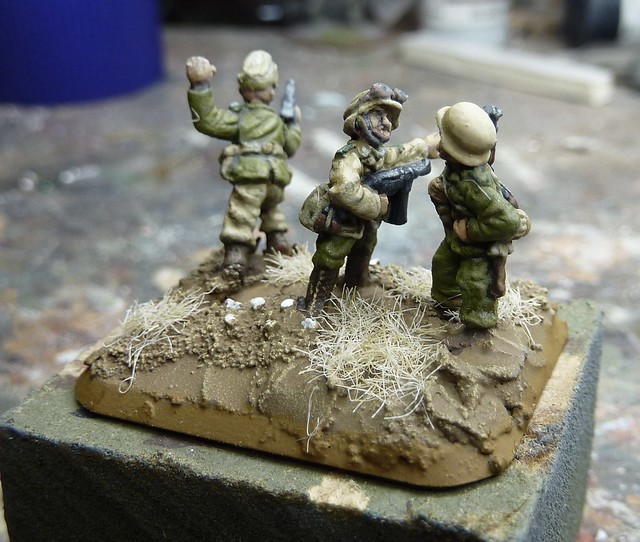
Now, the Plastic Soldier Company have been producing some fantastic plastic kits of late, but all the German kit is 'sans Zimmerit'.  That's fine for stuff pre December '43 or post September '44 but, for the admittedly quiet  bit in between, the models are technically incorrect.

So what's a boy working on an early 1944 army to do?  There's two obvious choices here:
  1. Ignore it.  At 1:100 the Zimmerit is barely visible beyond a slight surface patterning and a softening of the edges.
  2. Try and sculpt it on.
I'll admit that Number 1 was the most tempting, given I still haven't started painting the StuG, but the PSC kit did leave me with a load of spare StuG F8 hulls to experiment on so I thought I'd give it a go before entirely rejecting it.

Looking at the patterns of Zimmerit used, I decided that the columns of horizontal lines (pattern 1 here) would be the easiest to replicate (although the waffle scheme - no.6 - was pretty common on StuGs and does look cool).  I also decided to try three methods of replicating it:
  1. Paint on green stuff, sculpt lines as soon as applied
  2. Paint on green stuff, sculpt lines as soon as the green stuff darkens and dries
  3. Paint on green stuff, leave overnight, then sculpt in lines the next day.
Here's the sculpting tool I used.  The important thing is to get something with a decent, broad-ish point on it.
P1020082
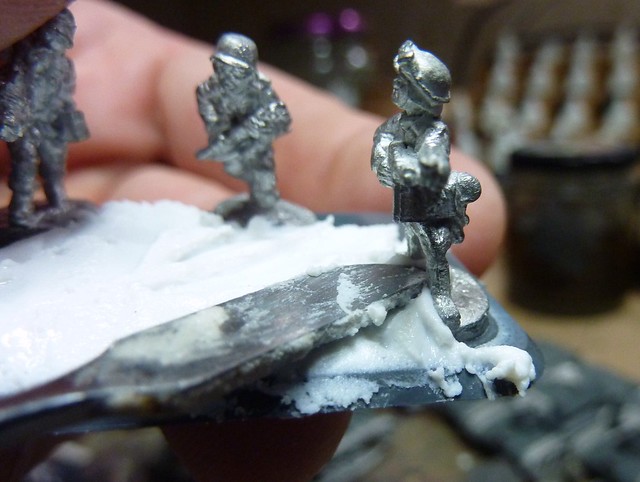
Also, kind of looks like a xenomorpth tail
Approach 1 - Wet Sculpt
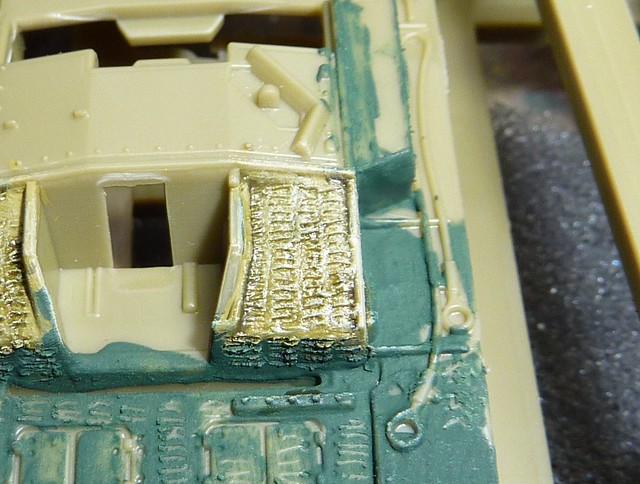
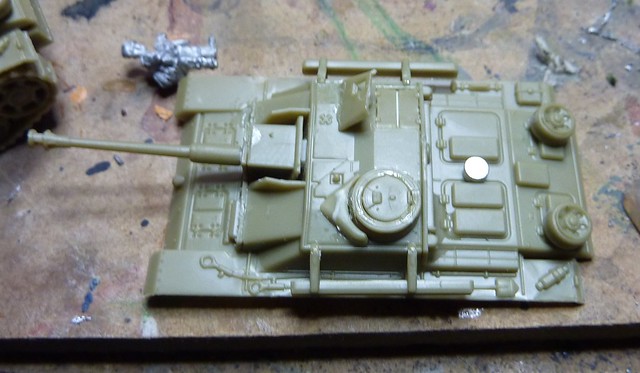
I used a standard GW paint brush to apply some liquid breen stuff evenly over the armour plate.  It's important to get the thickness right.  The yellow plastic underneath should not be showing through.
I applied the green stuff to one location then used the sculpting tool to sculpt the lines in.  If I was doing a whole tank I'd then proceed to do the next location, and so on, always sclupting the green stuff as soon as its applied and not letting it dry.  As it was, I only did the one panel to assess the look.
P1020076
Approach 1 - Sculpted straight after application
To better show the panel off, I then painted it Vallejo "Middlestone", followed by a 50:50 Brown and Black shade followed by a "Buff" drybrush
P1020078
Approach 1 - allowed to dry and painted
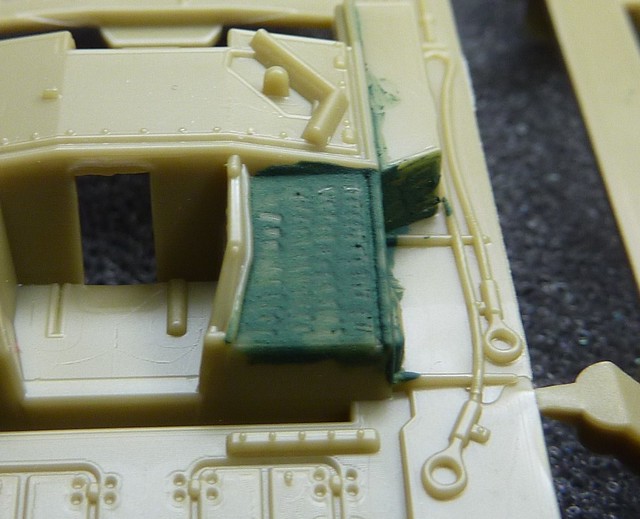
Approach 2 - Short Dry Sculpt
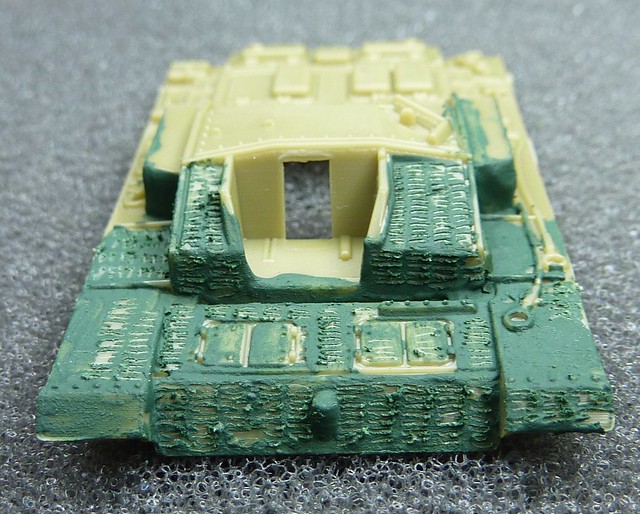
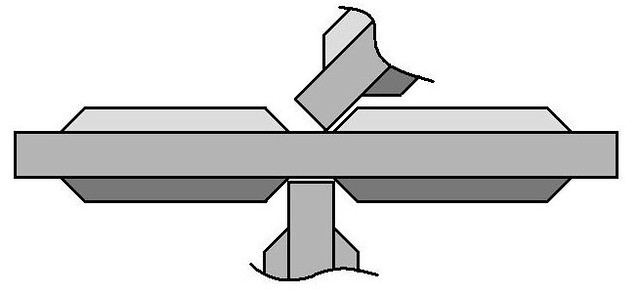
I used the GW paint brush to apply liquid green stuff on all panels.  I should not that the real zimmerit wasn't applied all over a tank (this large scale photo-etch kit shows where it should be), I just wanted plenty of area to experiment with.
P1020071
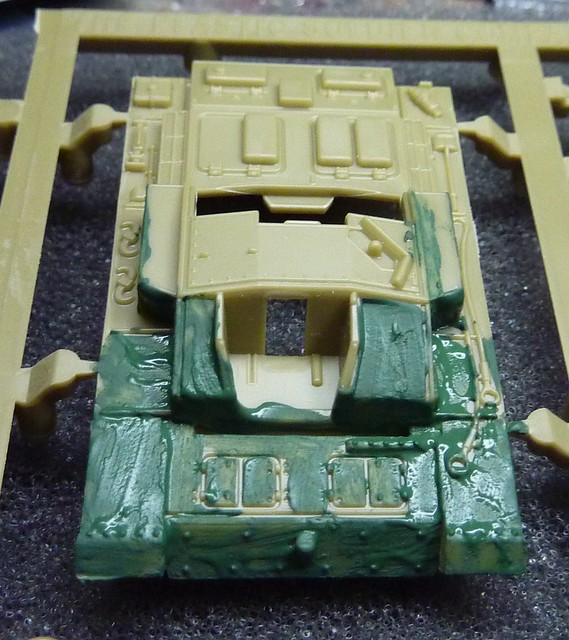
Very reminiscent of my early "Space Crusade" era work.  Thick, blotchy and un-even.
I then waited for the green stuff to change to a darker shade of green all over (about 30 minutes).  At this point I then set to work with the sculpting tool.  One thing I noticed was that if I got the lines too close together, it tended to rip the green stuff off which may be useful as a technique for doing battle damaged zimmerit.
P1020074
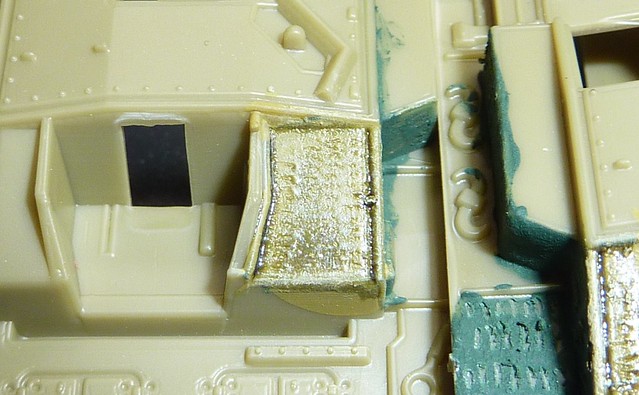
Approach 2 - Green stuff applied all over and allowed to dry sufficient for colour to darken
Here's what it looks like after painting
P1020079
Approach 2 - Painted
Approach 3 - Long Dry Sculpt
The liquid green stuff was painted on at the same time as Approach 2 but left overnight.  The next morning I used the sculpting tool to sculpt in the lines.  I found that it was a lot harder to get a decent line as the tool tended to stick in the solid green stuff.  Teraing seemed to be minimesd though.

P1020077
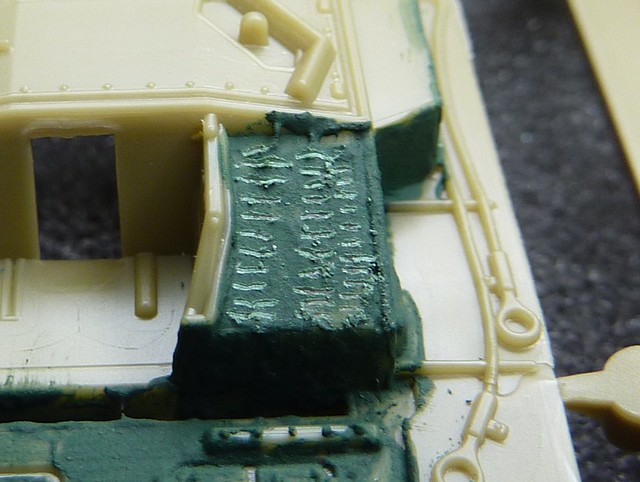
Approach 3 - Allowed to dry overnight before working
Here it is painted.
P1020081
Approach 3 - Painted 
Conclusions
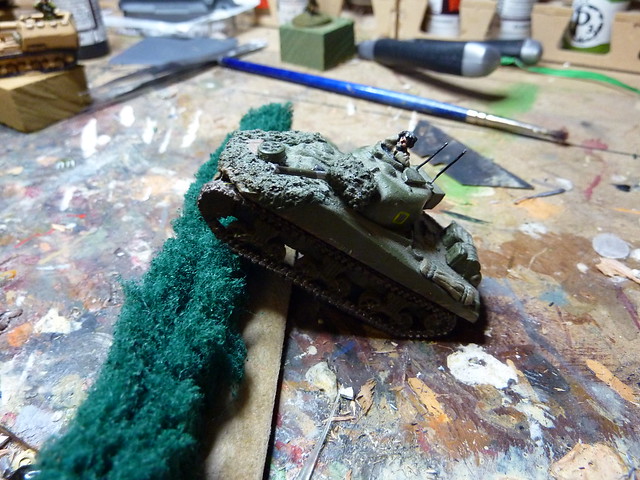
I'd have to say that Approach 2 works the best based on the painted results.  It's also probably the faster approach to use too.  Approach 1 is too slow to do and far too subtle.  The texture does not come through the paint.  Approach 3 was equally underwhelming and difficult to work.

I painted up the Approach 2 example fully (or at least the modded area) to get a better look at the end result.
P1020083
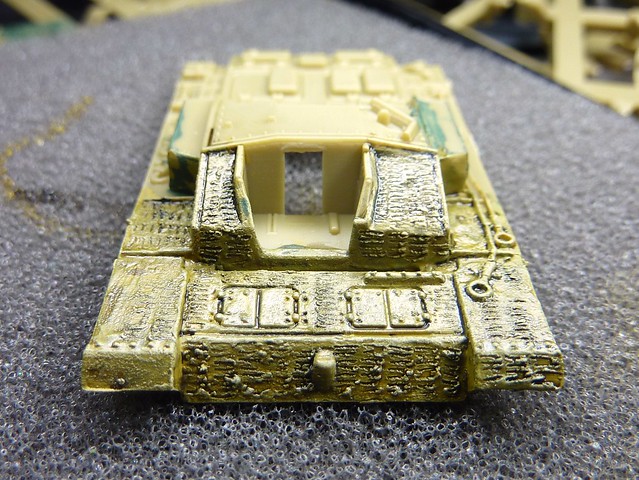
As mentioned - Zimmerit wouldn't be on track skirts and lower hull top surface as I depicted here.  So don't copy it!

But, I'm still not convinced the end effect is worth it.  The result is far too subtle and really just merges into the paint scheme.  I'll probably stick to non-Zimmerit on the StuG battery but it does seem possible to apply  it if it really bugs you.

I'd appreciate some feedback on this.  Which do you think works better?  Is it worth doing at all?  Feel free to leave a comment below.

Wednesday, 29 February 2012

Commence engine restart procedure

in 3... 2... 1...

Hmm, November 2nd was the last update you say?  I guess I have some explaining to do...

Okay, so about November I really knuckled down on building terrain for the Brighton Bash Tournament.  With the assistance of Mike and Nathan, over the course of November, December and the first few weeks of January we cracked out 40ft of tree lines and about 50ft of hedge rows along with some Ironclad Bocage sections and a Kerr and King village in a box!  The likes of Skip, Steve B and Si also contributed.
P1010839
Kerr and King Normandy Buildings - Donated by Skip, base coated by Mike (along with FFI graffiti), fine detail and frontage by me.
P1010837P1010838

The tournament seemed to go well and the terrain was well received.  I took photos over the weekend which can be found here (photo-bucket uploaded them in reverse order annoyingly).

It took me a while to recover enthusiasm after that, but did eventually pick up the brush in late January to do some M3 Stuart I "Honey" tanks in Operation Crusader era Caunter camo.  I took photos along the way and we'll look at them at some point in the future.
P1020023
Ready to stroll around the blue!
Finally, the release of the Grey Wolf and Red Bear source books for Flames of War got me looking at the Eastern Front with renewed interest.  I picked up a few boxes of Plastic Soldier Company StuG III to form a Begleit StuG Battery and that really forms the basis for today's article.  If your interested, I did a review on the StuG kit over at Mighty Miniatures.

I want the StuGs to be multi-purpose so they can be just as easily used as a Panzer Battalion equipped with StuG IIIG or as a Normandy era StuG Battery, neither of which have tanks riders.  Now, I could just ignore the tank escorts when appropriate and leave them as a permanently fixed part of the tank, but that would be far too simple (as well as confusing if I don't upgrade all the platoons in the company to have Begleit).  Instead, I want to magnetize the the riders and the tank to make them removable.

The main issue with this approach is the Begleit StuG riders.  They come as a set of separate figures, rather than as a clump of figures (as the Russian equivalent do/did).  Whilst this makes for a more versatile figure it does complicate the magnetisation process!

To get around this I decided to use a central piece of stowage to take the magnet, and then mount the figures from this, daisy chaining them if necceary.  This would allow me to disperse the figures around the back of the tank whilst still keeping them as a single whole that could be lifted off as required.

Placing the magnet on the tank side was simplicity itself.  A Ø1.5mm rare earth magnet (I used Modifix) would sit in between the engine covers of the StuG so the magnet on the tank would need to correspond to this location.
P1020035
Almost made to measure!
The plastic is thin enough to be semi-transparent.  Holding the upper hull of the StuG up to a bright light, I scribed the corresponding point on the underside of the hull between the engine deck blisters and used this to glue a magnet in place.
P1020028
Stealth Mode Initiated!
 It's important to keep all the magnets pointing the right way so I glued a magnet to a piece of stowage first and held that in place on the hull when gluing the one on the underside.  The magnet on the underside will, when dropped into place, self locate AND make sure its pointing the right way.
P1020032
If you look closely you can see where the magnet dragged itself into place
That done, I completed the construction of the StuG's (an article in itself, maybe next week).  The magnet on the tank is now completely out of sight.

The next stage is to play around with some blue tac and find a good pose for the tank riders.  I use three or four of the Begleit models for each tank, positioning them around a crate, oil drum or other convenient piece of stowage that will accommodate a 1.5mm magnet.
Once happy, I use a 3mm drill bit in a dremel to drill a hole to locate the magnet.  I then place the magnet on the hull (to ensure its up the right way), added a dab of super glue and then put the drilled stowage onto it.  Keep moving the two bits so they can't get stuck to the hull!
P1020029
It's obviously important to make sure that  the stowage is bigger than a 3mm hole...
It's now a case of pinning the Begleit to the stowage.  Take one of the Begleit and dab a bit of bright paint (I use red) on it then push it against the stowage to transfer the paint over.  This lets you work out where you should drill if its difficult to judge.

Now, use a 0.5mm/0.75mm drill to place a hole on both the Begleit and the stowage.

You now need a piece of metal wire to pin the two bits together.  I use sandwich bag tie wraps as they tend to be about 0.5mm thick.  Cut off an plastic covering and stick one end into one piece with some superglue.  Once dry, cut to length and stick into the other piece.
P1020039
The very definition of "being pinned"
A similar technique can be used to attach a Begleit to a Begleit already attached to the stowage ("daisy-chaining").
P1020042
Oooh, nasty!
P1020045
As can be seen, a similar technique can be used for 0.50 cal exit wounds...
P1020046
<sing>"here I am, stuck in the middle with you"</sing>
Once this is dry it should leave a cluster of Begleit and stowage that lifts clear of the hull like so:
P1020049
All ready to keep them damn ruskies off the StuG
P1020050
"Stealth Mode Ini.. wait.  What do you mean it doesn't work on the escorts?"

The next stage will be to go back and add some green stuff tarps and bed rolls to hide the pins where I've needed to use long ones and also add some more stowage so it really looks like the Escorts are having to find somewhere to sit.

Of course, the magnet in the hull would also allow us to make "destroyed" smoke plumes or clusters of stowage (so the rear hull doesn't look empty without riders).

So there we go.  Next update will either look at the finishing work on the escorts or tips on building the StuG kit depending how much work I get done!  I'll try and get back into weekly updates too.


Wednesday, 2 November 2011

Green(stuff) Piece

Hello,

Just a quick update.  I had started writing this entry a few weeks ago to kill time on a business trip.  Finally got around to finishing it off now.  I had made a start on the hedges for the tournament but I've had some difficulty getting a straight cut and need some fatherly assistance.  sadly he's still in Devon on his holidays...

A few years ago, BF used to put a tank crewman in with each tank and these were great little figures, generally either a wounded crewman clutching his arm or a more... pro-active one clutching a sub-machine gun like he's going to hunt down the ATG that just brewed him up.  The German's also got a pretty neat one of one crewman dragging a dazed comrade forward.  At some point BF stopped putting them in the Blister which was annoying but I had managed to build quite a stock pile of Brit and German ones anyway, with a few given by other guys in the club who didn't use them.

Now, I typically use them to show a tank is baled/bogged by sticking one on a penny (I used to try and get a full crew onto a small base) and I have used one as the basis for a tank commander previously, but I was running short of DAK figures to finish off my command bases and I thought, "why not just use some of the SMG armed ones?"

There are two figures that wouldn't look out of place on a DAK base.  One has the DAK style peaked soft cap, goggles and shorts with MP40 by his side whilst the other is emptying his SMG towards the enemy.  Really, the only thing they really need is some webbing (canteen, maybe the bread bag too) to make them blend in with the infantry/guns they are leading.

I'm no sculpter but I have had a stab at using green stuff in conversions before, such as the aforementioned tank commander.

Compared to that, a canteen and bread bag seemed pretty simple!

Firstly, I looked over some reference material (google searches, looking at other DAK figures) to try and work out how the webbing should look.  It's important to get the big detail (relative size, shape, position) right because no amount of fine detail will hide a major boo-boo like getting the canteen stupidly big or on the wrong side!

Here's how it should look:

The next thing is to work out how the sequence.  We need to work outwards with the greenstuff so its Bread Bag, then Canteen, then the strap of the canteen that holds the cup on (the metal cup of the canteen will just be a simple line break on the canteen shape).

Next, I knock up some green stuff into a 50:50 ratio.  I recall an old White Dwarf article saying to use half of what you think you need and it has always seemed good advice; I always seem to mix too much, even then.
No doubt modern White Dwarf would tell you to mix three times as much as you think you need!

The bread bag is fairly simple to do.  I roll out some green stuff onto a wet tile (greenstuff doesn't stick well to wet things.  So keep blades and fingers damp!) and, using an existing model as a reference, cut out a thick rectangle of about the right size for a bread bag.

Now, using a wet blade, lift the rectangle off the pallet and place on the right rear side of the model (again, worth checking a reference when doing it).  I let it sit for about half an hour to partly cure then used a sculpting tool to remove the material between where the belt loops sit, add an indent around the edge to represent the breadbag's front and add two indents for the buckles.

P1010779
Not modelled - Bread
It's important not to rush things so I left the bag to cure overnight.

Next I worked on the canteens.  I mixed up some more green stuff and formed it into a tear drop size about the size of the canteen (including cup).  This was placed over the breadbag (if present) and allowed to sit for about thirty minutes.  I then flattened the top down to square off the cup and indented a line to show where the cup meets the canteen.
P1010781

P1010783

P1010780


I left that to cure fully and pondered the next step.  I needed a strap to join the canteen to the cap/cup.  However, after a few attempts I had to admit that such a fine strap was just out of my ability.  Thankfully I spotted a post by one of my fellow Brighton Warlords, Ade over at Restless Wargamer.  He had been playing around with a GW product called liquid greenstuff with great effect.  Luke at Onslaught Games had some in stock so, on a whim, I grabbed a bottle.

It's pretty neat stuff.  It can be picked up by brush and can then be cleaned off in water with little impact to the brush afterwards.  It seems to be aimed at patching up finecast models but I decided to experiment and tried "painting on" the strap, like painting a fine line.  This seemed to go well, but wasn't quite as defined as much as I wanted.  Once it cured, I painted on another layer and this seemed to do the trick.  Once it cured, I cut the strap square at the bottom and did some mild filing to get the strap flat but otherwise it required very little work.
P1010820

P1010819


So there we go, some relatively simple greenstuffing converts spare tank crews into interesting alternative DAK infantry/commander.

Tuesday, 20 September 2011

"Base" of fire

Hello!

This week I thought we'd look at how I do the basing.  It's something that I usually get asked by the new guys and I know its one aspect that a lot of the chaps at Brighton Warlords seems to hate!

I've experimented with various methods since my first army.  Initially I just stuck the figures on the bases and covered in sand, a direct throwback from my transition from 28mm Games Workshop!
truck_and_team
MY EYES!

As you can see, it lacks...charm but it is relatively simple and could be easily improved by building the sand up around the figures to blend their individual pedestals in.

After the first two platoons, and on the basis of a few examples on the old Battlefront website, I started experimenting with Poly-filler and have pretty much stuck with it ever since.

Now, there's two camps of thought on using poly-filler:
The first camp just covers the base with poly-filler and then sticks the figures in, relying on the poly-filler to hold it in place.  Benefits?  It's quick and easy.  Downsides?  It can leave the poly-filler sitting away from the figure's pedestal (which can be hidden by other basing materials) and can leave the models susceptible to parting ways with the base over the course of a game!

The second camp, the one I fall into, sticks the figures to the base and then applies the poly-filler around the figures.  This is a lot more time consuming, messy and fiddly but, in my opinion, gives a better finish and certainly gives a stronger bond between model and base.

So, how to do this without going mad?  Let's look at the process:

Materials
So, all polyfiller's are equal?  In my experience, no.

  • The mix-yourself stuff can be good but, honestly, I'd rather spend an extra quid or so and not spend half the evening trying to nail the ideal consistency!  
  • The cheap "generic" ready-mix was, on both tubes I ever used, way too liquid and a nightmare to work with.
  • My ideal choice is the branded ready-mix.  A tube goes a long way so I don't see an issue with the extra cost and it always seems to be in a nice, fairly dry, mix that is easy to work with.

Interestingly, I don't advise using the ready-mix  for decorating as it dries too hard and is a bitch to sand down. But I disgress...

Tools
I use a few tools when working the filler:

  • Old GW sculpting tool - the one with a knife edge on one end and a scoop like end.
  • A metal pick - perfect for poking between the legs - oo-er!
  • A spare base.  Just to place excess polyfiller off the blade edge till its needed.  


Method
First step, stick all the figures to the base, painted or otherwise.  I prefer doing all this before painting but it should work out okay with painted models with a bot of care.  Now, drop a pea sized dollop of poly-filler on the base, somewhere away from the figures.
P1010755
Atchung!  Filler!
Now, use the sculpting tool to start working the filler towards the figures, adding more filler to cover.
P1010756
This, of course, would work well for Eastern Front snow bases :)
The trick to working the poly-filler, especially up to the feet and between the legs, is to keep the tip of the sculpting tool wet, so that the poly-filler doesn't stick to the blade.  You don't want an excessive amount of fluid on there as it makes the polyfiller go very smooth, robbing it of its texture.
P1010757
Sculpting Tool to the nads - definitely not Cricket!
This should eventually leave you with a base like this.  If you want to add the impression of weight to the figures (such as guns sinking into soil or infantry sinking into soft sand) then you can let the filler partially cover the feet, but for the most part you probably want to avoid submerging the figure too much.
P1010758
"Wet look" is in this season
As the base starts drying, its possible to disturb the poly-filler with the sculpting tool to add some extra texture.  Another way of making the base more interesting is to add sand in patches for "rocky" areas and the like.  This can be sprinkled on when the polyfiller is wet, but I find it better to use PVA glue once the Poly-Filler is dry.
P1010778
"And over here we'll add the fuher water feature.  Oh Hans, it will be magnificent!"
Once its all done, its just a case of base coating a suitable earth tone and dry brushing up.  Adding stilfor or static grass can also make the base more interesting as well as hide a multitude of sins...
P1010772
See!  Multitude of Sins successfully hidden.
Finally, something I'm experimenting with is using the dried up Poly-filler that collects in the cap to create rocky outcrops.  Just break a bit off and stick into the wet polyfiller, especially in an area that's gone too smooth through using a wet tool (oo-er, okay enough of that).
Stone Cold Paul Austen has also done something similar.  He cracked the dried Poly-filler out of the container he uses to mix it and got some very large bits to add flavour to the base.  he was kind enough to let me have some of hos photos to show the technique off.  Cheers Paul!
294062_2328140804960_1292897423_32893685_2389689_n
He does try and claim bullet-proof cover all the time though...
262805_2328071963239_1292897423_32893575_8337693_n
Paul's bunker-busting sniper team

See you next week.

Friday, 29 July 2011

Hedge-ing my bets

Hello,

Still no A13.  My own fault for not picking up the glue gun when at Mike's.  Doh!  Thankfully I have that back now.

However, it has been somewhat overtaken by events.  Those who follow me on Facebook/Google+ or whom frequent the Brighton Warlords or Flames of War Forum will know that we've just announced a Flames of War, late war, 1750pts axis vs allies tournament in mid January.

The last tournament we ran spurred me on to create enough road for 16 tables, two winter tables, about a square meter of cornfields and more cabbage patches than probably existed in Northern France.  It made for some pretty tables but it also pretty much burnt me out on terrain making until about now.
P1000187
"Welcome!  Beware of 88's"
P1000189
You can't see it, but there's an M-10 lurking in this photo ready to mess that Sherman up.
Hill2
King of the Hill - FoW style
One of the projects that didn't make it off the drawing board was a simple to make hedge.  Linear terrain can play a big part of making a convincing and fun to play on board.  Recce can exploit it for cautious movement, infantry get some safety from HMG and controlling the high ground becomes even more important than normal.  The BW club has a shoebox full of Ironclad Miniatures Bocage which is enough for a few good size fields on one table, but that's about it.

Now, one of the first bits of non desert terrain I made was a massive hill complex, covered in trees.  The trees were made from scouring pads stuck on a BBQ bamboo skewer.  Spray black and drybrushed green, they were surprsingly effective.  Before the tournament I then revisited the concept and skipped the black undercoat. This wasn't quite as pretty but could be made quickly and still worked when mixed in with the older ones.
tree1
"Scour that tree line, men!"
So, based on that, it seemed that a scouring pad hedge would be a good bet.  I made a test piece by gluing two strips of scouring pad together and then sticking that to a strip of MDF.  This basically gave me something that looked like two badly mauled bots of scouring pad stuck to a piece of MDF...
DSC04865
Okay, maybe I'm a little harsh...
P1000030
How not to clean tracks...
At about this point in the process, and somewhat in a strop, I decided to ditch the project and pretty much haven't made any terrain since.

Skip forward a few years and whilst flicking through the stats for my Blog I came across this tutorial over at "Another Slight Diversion" that is sending me some traffic.  This was pretty much the missing link in the development of the hedge and I rushed to try it out to see if it would scale up.  I had the dregs of a can of Leather Brown and found some flock in my basing drawer.  Now, I can't remember the last time I used flock, but apparently I'm a pack rat and never throw things away.

After following the steps on the blog, I was left with this
P1010754
Over the 'edge lads!
A significant improvement!  My next thoughts were on how to scale this up so that I could produce about 32ft of it!  Driving cost down would be the main aim as using Army Painter brown and matt varnish would get pricey.  Instead, I plan to use Plasti-kote spray paint from the local B@Q at about £2 a can cheaper!  I have previously used the stuff for the winter terrain bases and to blue shade the white sheets and it seemed to do the trick for terrain making purposes.
P1000191
Some of said winter stuff.

The next thought was to make the hedge so that it didn't need junction pieces.  Basically, create a shape for the base that allowed the hedge to be butted up to another piece in any way that would be required.  Here's a sketch:

universal_base1
Behold the awesome power of MS Paint!
I cut the end of the prototype to match, you can see it on the right of the "over the 'edge" photo.

The base could also be used for wall sections.  I plan to knock up about 16ft of wall sections using foam card that I retrieved from the skip at work.  It's slightly warped, but given the short sections required I think it wont be noticeable.  This is my first proof of concept.
P1010749
Yeah, Dingo's are that low.
I want to spruce it up a bit by adding posts at one and the centre point so that when the walls are combined it looks like an evenly spaced distribution of posts.  The posts would be made from high density polyester foam, cut into a column with a hot wire cutter.  The whole lot will then be covered in textured masonry paint, washed with thinned down decking stain and dry brushed to resemble a weathered, rendered, white washed wall that one could reasonably expect to run into all over Europe (alternatively, I'll scribe a brick/drystone texture into the foam).  I may even use cardboard to add a slate tile cap.  

So, that's the start of a plan.  Hopefully over the next couple of months I'll be able to bash that out, with help from the rest of the Brighton Warlords FoW community, and start looking at some extra projects to round out the tables (embanked and cobbled roads, irrigation ditches, a few ridge lines).

Times ticking...

As a final note, updates may be sporadic again until September.  I'm helping the rest of the family with a few building projects so free time may be at a premium!