Wednesday 1 December 2010

Remember Small Scorpions Are The Deadly Ones!

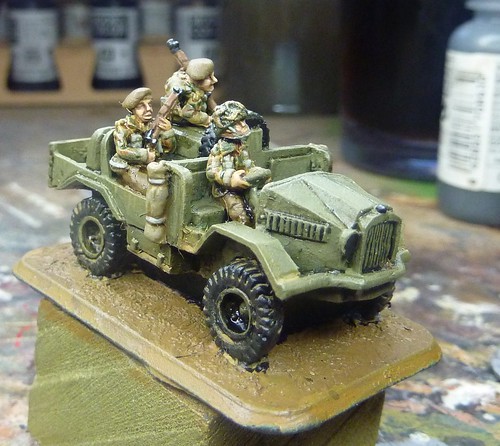
The last week has seen painting commence on the new 1/300 project with the first troop of armour getting painted.

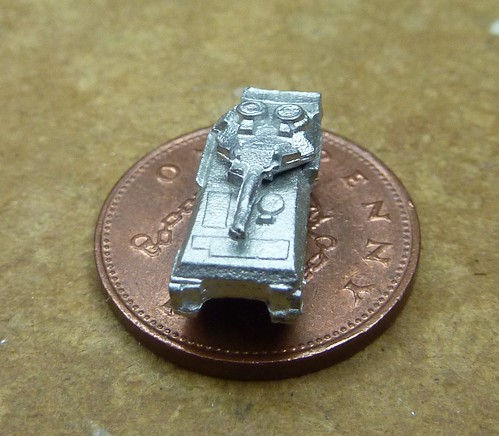
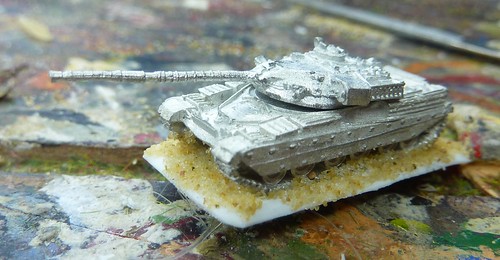
I'm going to be writing reviews on another blog (more on that soon) so I'll stick to concentrating on the modelling and painting of the models here. Having said that, I will now apologise for just how rubbish the Skytrex Scorpion CVR(T) model really is. It really is a poor depiction of the tank and the fact that I'll now probably be hiding these in a cupboard rather than use them made them a logical choice to be the test pieces for painting in this scale.

Research
First task as always was to work out what the tanks should look like!  Principally I was looking to establish:
1.  Colours used
2.  Camo Schemes
3.  Markings (yes, really).

For source data I hit up my library of books for colour photos, hit up 'Armoured Acorn' and backed this up with liberal use of google image search.  It seemed that British armour markings has change very little over the years and the base colour is still Olive Drab.  The camo colour seemed to vary between very Dark Green (especially in period photos) and Black (present photos and some of the period ones) and its hard to tell if that is down to poor photography in the period or variation.

Thankfully I had a tie breaker in the form of my dad who crewed Chieftains back in the day.  His recollection is that the camo colour was black and that the olive drab colour was not a million miles way from that used on my 15mm Shermans (basically a combination of Army Painter's 'British Armour' spray and Vallejo 'Russian Uniform').
Primary sources aren't infallible but can be handy for making a decision!

The camo pattern was a little trickier.  There seemed to be a lot of variation in schemes so I decided to just find one that I liked the look of.  A further boon was finding some shots of the Scorpion (or a large scale model at least) from all angles which gave a good idea how the camo flowed.

Markings were scare, seeming to be vehicle registration marking front and back (white lettering on black rectangle) and the occasional yellow bridge marking.  The exhaust on the left hand side of the vehicle seemed an interesting item to pick out (red oxide painted) as well as the vision blocks.  The Skytrex model lacks much else to really engage or reward the painter.

Basing
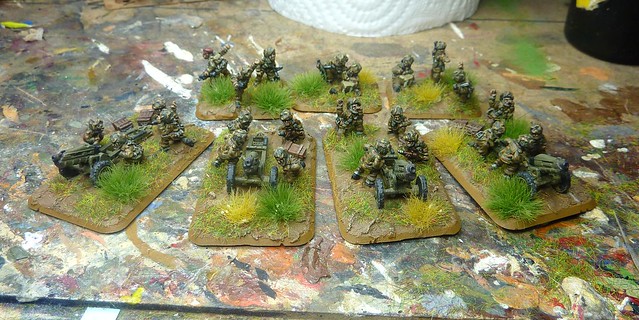
Unlike 15mm, the 1/300 lends itself to basing tanks.  I cut 1mm thick plasticard into 15mm wide strips.  I then cut these strips to slightly longer than the tank.  Using a Dremel with a grinding attachment I then chamfered the edges of the base.
That done, it was just a case of cleaning up the models (6mm is as flash ridden as any other scale sadly), supergluing them to the base and using PVA glue to apply sand for texture).

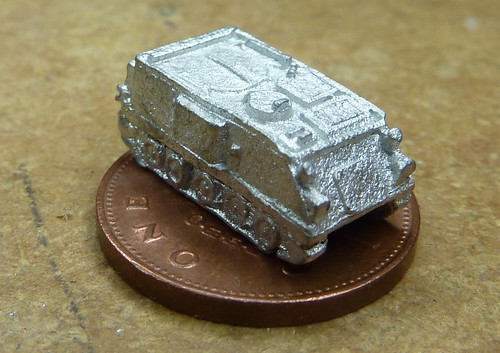
Here's a GHQ Chieftain to illustrate.  These bad boys will be on the blog within the coming few weeks.
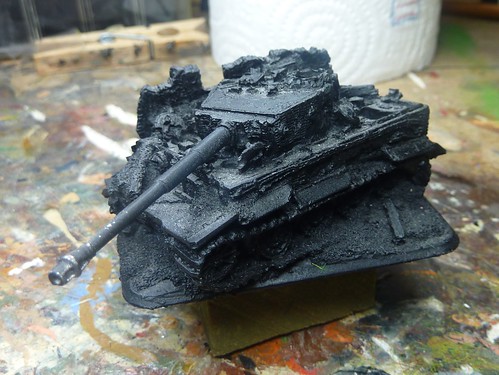
P1000915


Undercoating
As with previous projects, I made the decision to use the Army Painter series of coloured sprays to save time  by effectively undercoating and priming at the same time.
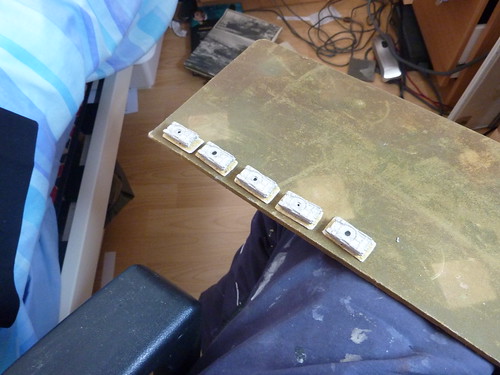
Firstly, I blue-tacked the tanks to a piece of MDF board.
P1000916

Next, the Army Painter 'British Armour' (its sold through Battlefront and is re-branded accordingly) was applied in three thin coats.  The Army Painter website explains the technique used better than I can so check out the videos there.

This leaves the models looking like this:
P1000917

A thinned down coat of Vallejo 'Russian Uniform' (basically the same shade as 'British Armour') was applied to cover any parts that were missed by the spray.  I also took the opportunity to paint the base 'Chocolate Brown'.
P1000918

Wash and Dry(brush)
Unlike the 15mm models previously covered, I decided to use an all-over wash rather than carefully applying it.  As with previous models, I used a 50:50 mix of Vallejo Black and Brown shades.
P1000920

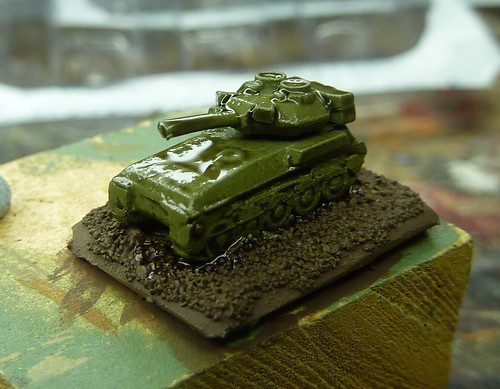
Once dry, I used an Army Painter large drybrush to heavily drybrush 'Russian Uniform' back on the model, picking the edges and what little raised detail was present.
P1000921

This was followed by using the same brush to lightly drybrush 'Yellow Green' to act as a final highlight.  With hindsight, Yellow Green is too... yellow.  The next batch of models will likely use 'Grey Green' instead.
P1000922

Using a GW standard brush I applied 'German Grey' in broad bands to match the photos I mentioned earlier.  I used 'German Grey' rather than 'Black' to give the effect of the paint being bleached by sunlight in the field.  Whilst happy with the look at the time I'm now wondering if its too light and may darken it with Black shade on the next models.
P1000923

I then thinned down 'London Grey' and applied a highlight to the now grey areas as drybrushing would be difficult to achieve without marking the green areas.
P1000924

Fine Detail (i.e. How to go insane/blind)
Yes!  Fine Detail at 6mm!  Not quite cap badges and rank markings but not far off!
First I used thinned down 'Black' paint (not shade) to add a blob of black on each vision block.  I did also intend to add a little white blob in a top corner of each block but sense prevailed and I left it at that.
P1000925

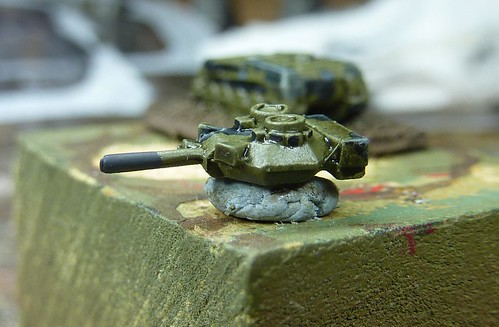
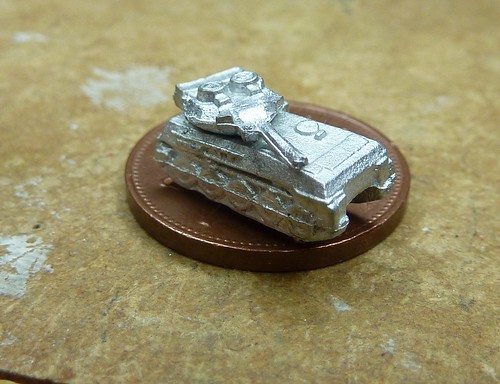
I then picked out the exhaust in 'Flat Brown'.  I'm not sure what the thing below the exhuast is and noted that there is sometimes a pry bar on the Scorpion in this location so I picked it out in gun metal along with whatever track could be seen (front, back and on top).
P1000926

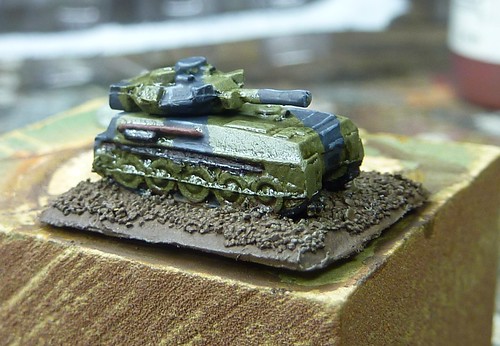
Basing Pt.2 and Weathering (or "getting dirty")
Obviously no tank look rights if its not covered in mud and this applies at 6mm as as any other scale!
Building on my experiments with using washes of field drab for ingrained dirt on the 15mm trucks of the last project, I again watered down 'US Field Drab' and applied it liberally over the lower half of the Hull, going slightly higher where mud would likely be chucked up at speed.

Once dry, I then tidied up the bases by reapplying 'Chocolate Brown' and then drybrushed 'US Field Drab' over to top once dry.
P1000927

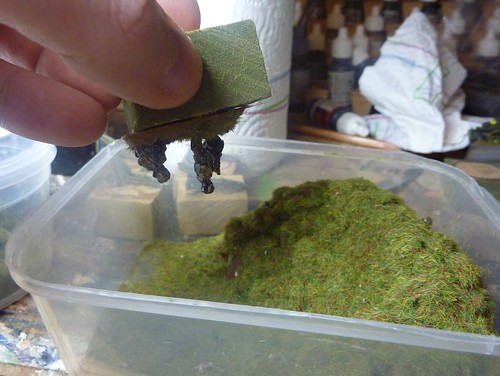
I then lightly drybrushed 'Buff' on the mud covered areas of the hull and the base to act as a final highlight for the grime.
P1000929

Finally, I applied patches of PVA glue to the base and sprinkled static grass onto the base.  

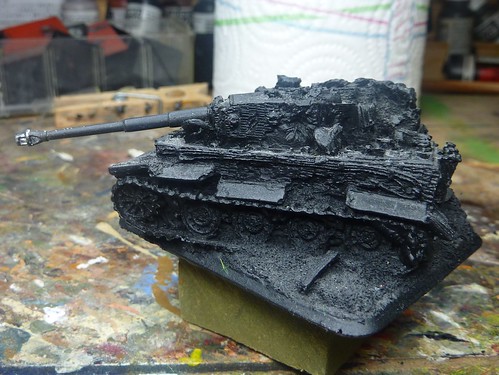
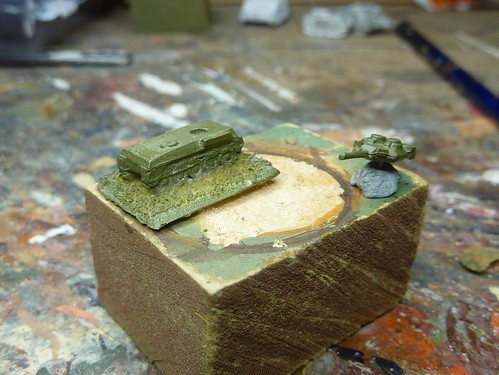
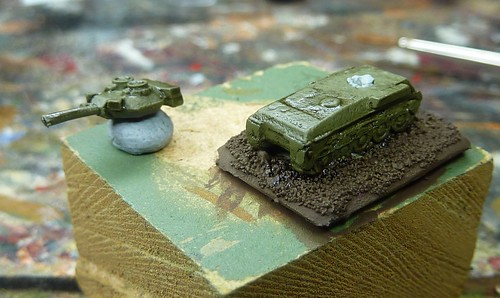
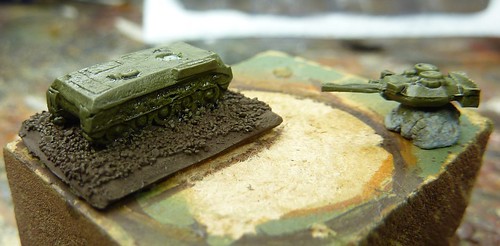
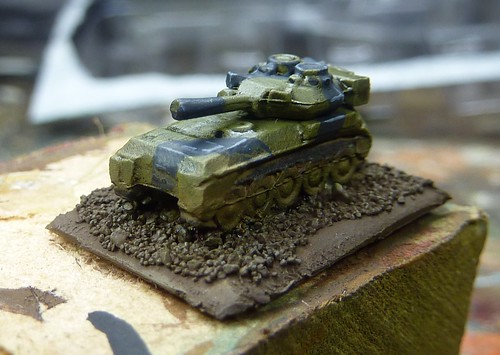
As a final experiment I painted up a fourth Scorpion but applied the grey area before the wash stage.  This seemed to give a much more satisfactory 'bleached black' and will be used from here on out.

P1000933
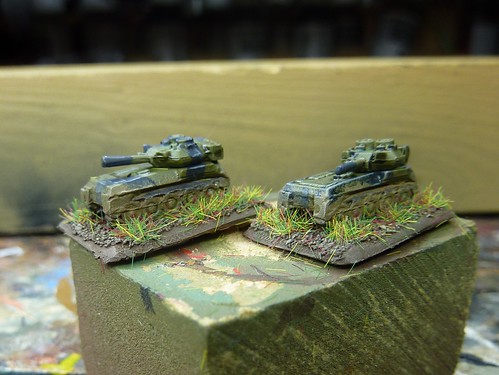
Tank on right has grey applied pre-wash.
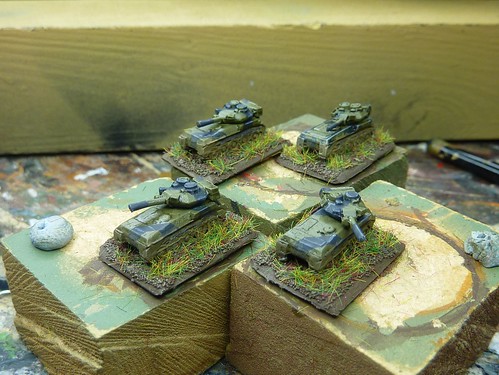
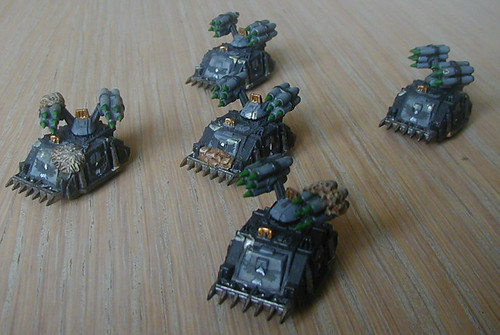
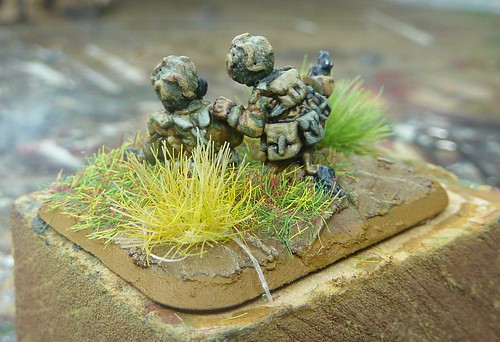
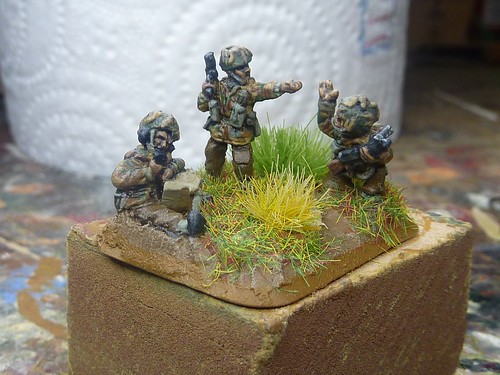
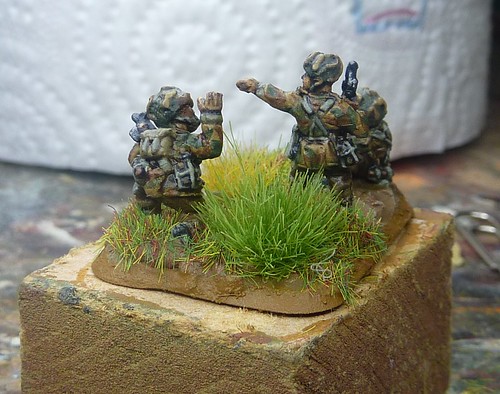
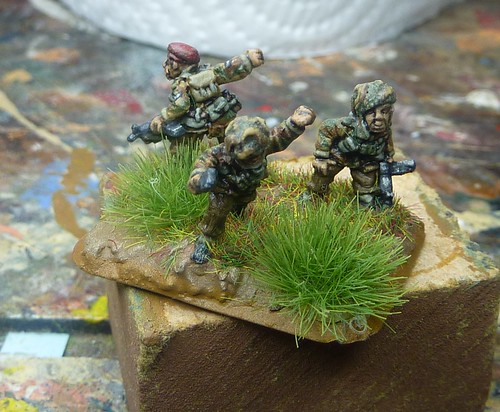
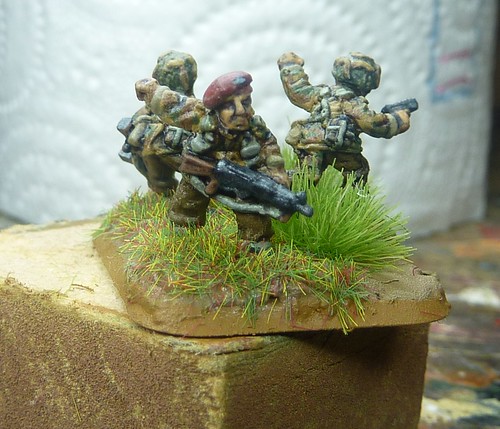
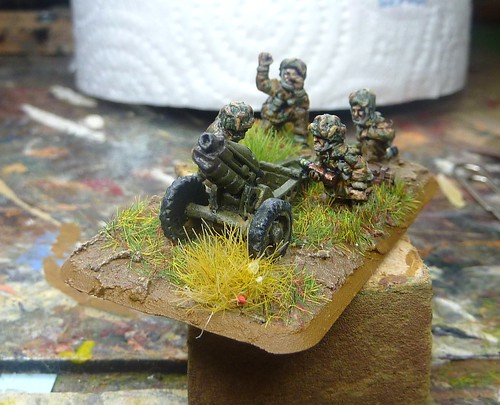
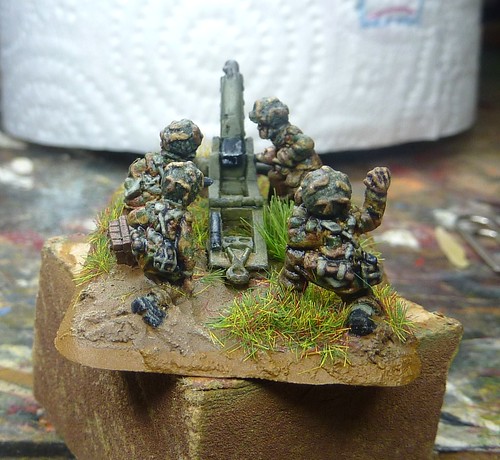
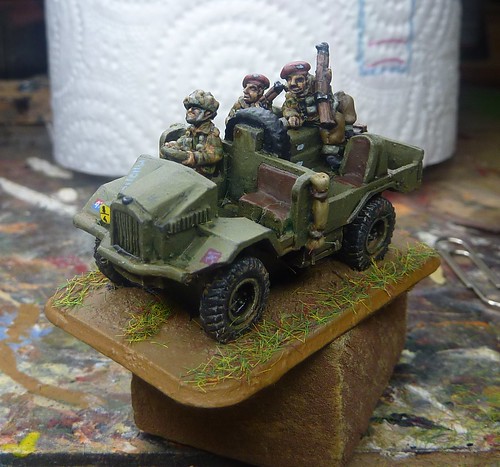
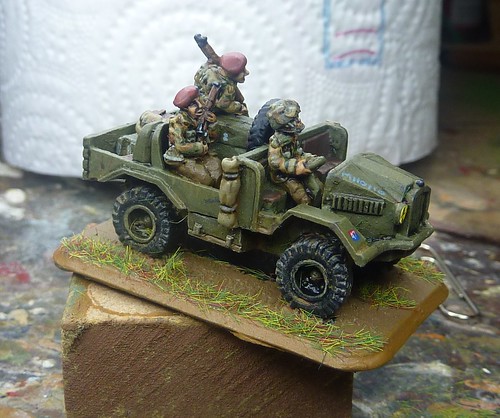
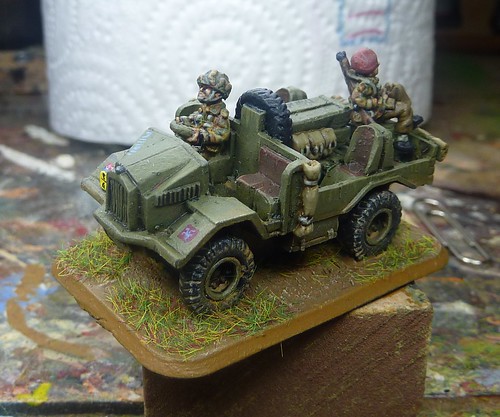
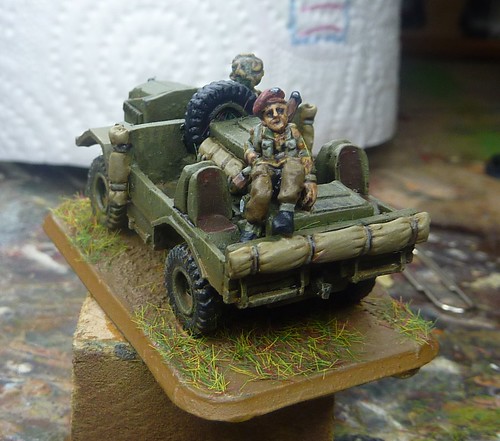
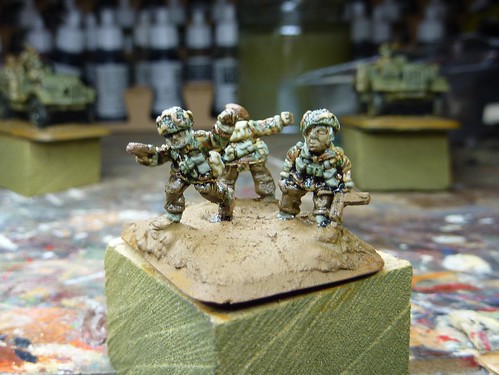
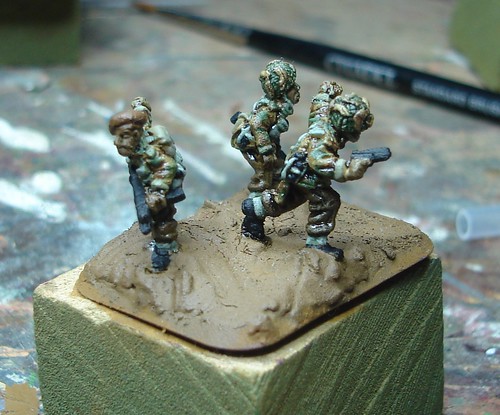
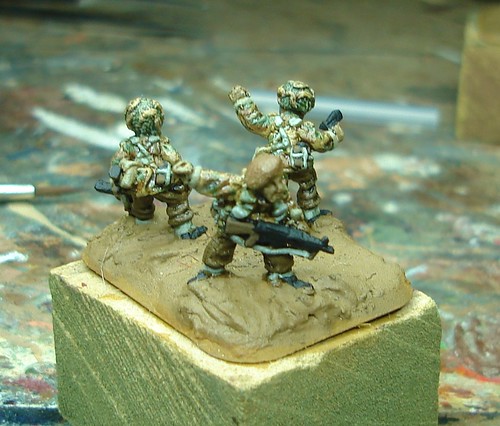
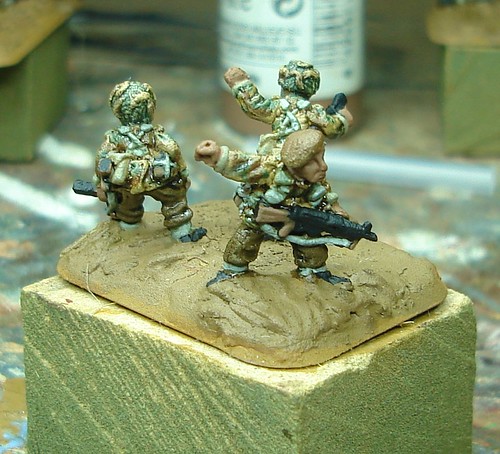
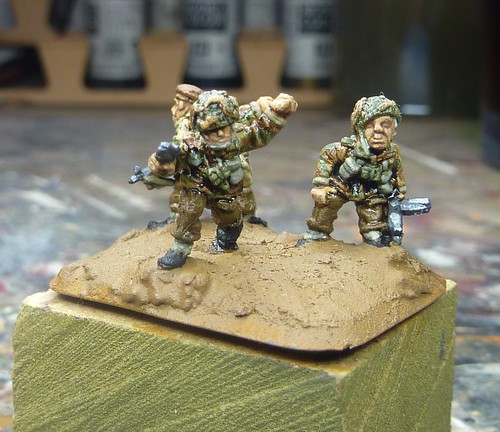
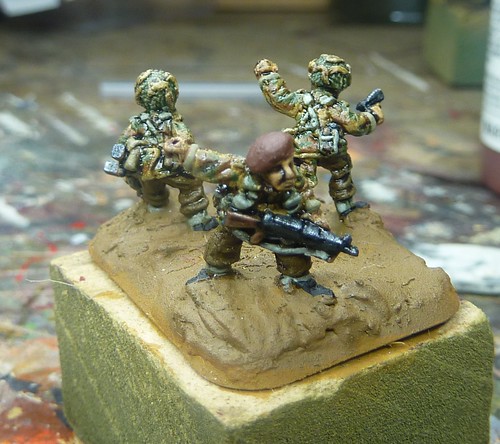
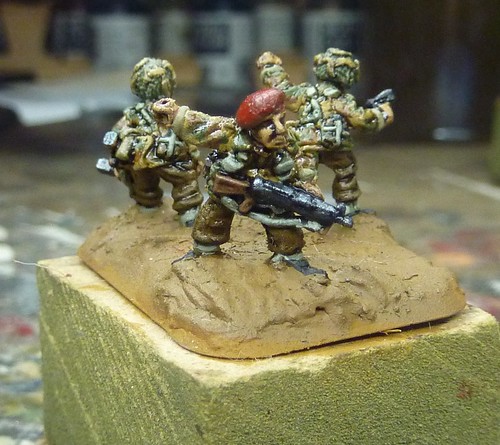
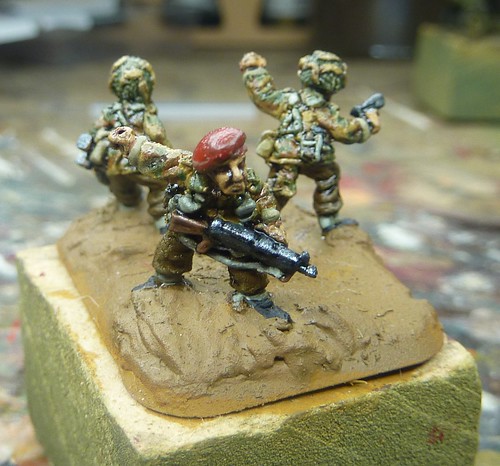
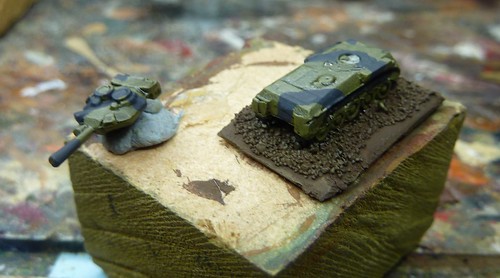
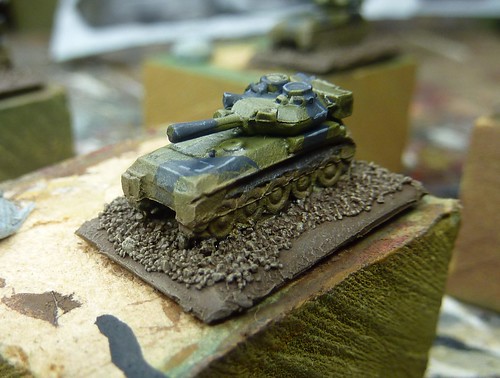
P1000935
The HQ Recce Troop!
All that's left now is a few coats of varnish and its all done.

Next decision is whether to paint up the FV432 to really get the technique down or just give in and paint some Chieftains.  Decisions, decisions!

Wednesday 24 November 2010

I'm not dead!

Sadly RealLifeTM has prevented me doing much painting or the like, but hopefully I should get back on track soon.

I've just taken ownership of the first pieces of my new project: 1/300 Micro Armour.

Skytrex are the first to deliver with FV432 and Scorpions being received today.  Here's a sneak peak:
P1000906
Scorpion Front (yep, that's a 1p coin its sitting on)
P1000905
Scorpion Side

P1000907
FV432 Front
P1000908
FV432 Rear

I plan to get these cleaned up, based and spayed over the course of the weekend and then use one of the surplus FV432 as a test piece.  I'm planning to use BF/Army Painter 'British Armour' to base coat and then paint black/'German Grey' stripes on.  I'm sure that will evolve as I get dug in.

6mm isn't an entirely unfamiliar scale as I used to paint GW Epic scale models and even, in the latter stages, went as far as modelling on sand bag extra armour and camo nets as this Whirlwind (used as Hunters) battery demonstrates.
Hunter_battery

Also coming soon should be some Heroics and Ros Aircraft and Infantry and GHQ Chieftains.  This leaves a question that has yet to be resolved....

How does one paint DPM at 6mm?


Tuesday 9 November 2010

Back to Bases

The Artillery Battery project is finished!

I've spent the time since the last update doing a  few extra bits of weathering, basing and the final coats of varnish (literally only an hour or so before writing this).

Firstly, I decided to apply one last bit of weathering to the vehicles and the guns.  I gently dry brushed 'Iraqi Sand' onto the wheels and lower surfaces to represent dust that has been thrown up whilst travelling across dirt tracks.

P1000836


P1000834


I then dry brushed 'Iraqi Sand' onto the bases to add a layer of highlighting to the dirt and pick out the texture on the bases.  The dry brushing also tends to pick up the bits and lower legs of the infantry and adds to help shift the models from looking 'parade ground ready' to something more appropriate to a week long campaign in Holland!

P1000837

The last paint to go on is a couple coats of Game Color 'Leather Brown' (not to be confused with Model Color 'Leather Brown') on the edges of the base.  This is is something I've done to my bases for years, originally using Citadel Colour 'Snakebite Leather' on 40K and Epic models!.  It's a fairly neutral brown that works on many different tabletops and helps set the model off.

I leave the models to dry overnight before proceeding with static grassing the bases.  I find Static Grass gives a good effect but is a pain to work with in some ways.  It tends to collect on a desk top and you can guarantee that a wayward strand will turn up on a model somewhere (the sharp eyed may have spotted a few strands that I didn't notice until after taking photos).  It's important that all paint is dry as it will stick to any wet surface and can give some odd looks as grass suddenly appears from the side of an infantryman's head!

First I apply PVA glue (using an old brush!) to about two thirds of the base.  I try and use this stage to hide any defects in the original polyfilling of the base (feet being submerged, cracks, voids, etc).
I then place the models in an old plastic container in a vain attempt to contain the static grass as I shake/pour it over the model.  I do a few models at a time just to quicken the whole damnable process.

P1000838

I then remove each stand and give it a tap whilst its flipped over to get the excess grass off and get it standing on end.

P1000839

Finally, the hot glue gun is turned to 'napalm' and Stilfor grass is stuck onto the base.  I've found that the best way of doing this is to leave the gun on its stand and just touch the tuft to the gun then quickly stick it to the base.
 I'm not  happy with the current brand I use as its a little garish.  I'm going to try the new(ish) Army Painter 'Highland Tufts' in the future.

P1000841

The final stage is to give two good coats of matt varnish (I use Army Painter 'Antishine Matt' as its easier to get hold of than Testors Dullcote) and we're all done!


For those coming late to the party; here are the stage by stage posts for this project:


Here are some of the finished models:
P1000855

OP
P1000843

P1000842

Battery Commander
P1000847

P1000848

The Battery Commander is the only non-BF model in this platoon. I just thought the Peter Pig figure looked more suitable for a Battery Commander. Commanding rather than leaping into an assault!

Gun Troop Commander
P1000846

P1000844

P1000845

75mm Pack Howitzer M1A1
P1000853

P1000854

15CWT Gun Towers
P1000849

P1000850

P1000851

P1000852

All in all, I'm quite happy with the end result.  There are still some areas for improvement in basing but I'm content with the new methodology for doing Maroon Berets and the smocks have come up very nice (as they should.  I've painted enough of them by now!)

So, what's the next project?

Well, I fancy doing something a little different and nothing quite says 'Different' like a brewed tigger!
P1000857

P1000859


See you next week.

Wednesday 3 November 2010

Attention to Detail

Firstly, apologies for going a bit long between updates this week.  The new Bloodbowl League kicked off on Monday so I needed to get some stuff done for that.  It was worth it as I got a win in the first game of the season so off to a good start!  Tuesday saw me down the 'Call of Dice' club at The Victory pub for a game of Duck Duck Go with Matt, Smurf and Seb so I missed my opportunity then too!

Since last post I've been working on the fine detail.  This is the stuff that isn't really necessary but tends to give the model some character if you do bother with it.  For the Para Artillery this includes:

  • Para Wings on the Beret
  • Rank markings (NCO only)
  • Shell and Case markings
The 15CWT also have serial numbers and unit markings applied.

Lets look at the cap badges first.  The paratroop wings look like this:
para_badge_o


Breaking the shape down its a triangle with a line down the middle.  That is more than adequate for the purposes of painting it at 15mm!  I painted this shape, first in very thinned down 'Black' then in 'Pale Grey Blue', just above the left eye on every figure with a beret.  Its important to get the paint thinned as it will flow better.  In a counter-intuitive way, its also better to NOT use a fine brush as it doesn't hold the paint well; nor let it flow.  You just tend to get a blob at the end of the bristles.  I use a GW Standard Brush as it holds the paint and allows it to flow down the tip.

At the same time I painted the NCO stripes on the arms.  This involved a similar process with 'German Camo Medium Brown' being laid down over 'Black' with 'Stone Grey' going on over the top.  I usually paint a single stripe rather than doing proper two/three stripes as doing the correct number of stripes tends to make for oversized markings.  Some painters can pull the brush control off for doing it so its worth doing a practice run and work out your own limitations.

This is the model after these two stages:
P1000826_zoom

Next, I painted some markings on the shell and ammo boxes.  Armoured Acorn has some good resources on ammo used by the British Empire, including the lend lease supplies.  I looked at the entry for the 75mm round used by the Sherman and assumed that the M1A1 Pack Howitzer would be similar.  
First I painted the casing 'Brass' and the shell 'Black'.  The shell then got a base colour of 'German Grey' followed by a 'London Grey' highlight.  I then gave the shell and casing a quick 'Black Wash'.
Using thinned black paint I painted a black line on the casing (to denote its charge - no idea if its appropriate but it makes the casing interesting) and used thinned down yellow to paint some squiggly lines denoting text.  Finally I paint the fuze cap 'Gunmetal' with a small blob of 'Oily Steel' right at the tip.
P1000827

Note the white squiggles and blocks on the box, taken from the reference sheet.  I also painted the rope handles 'Stone Grey'.  I did a similar thing on the 15CWT, but using the 17pdr Reference sheet for guidance.
P1000828

Talking of the 15CWT, this also received some fine detail.  Each vehicle in a formation would have a few common markings:
1.  Bridge Weight markings (yellow circle with one or two black numbers, typically placed over one of the driving lights).  A Morris Truck would have 8/6 (laden and unladen categories).
2.  War Office number (T for Tanks, M for utility vehicles, H for Gun Towers).  These were painted white typically but seem to be sky blue on colour photos of airborne jeeps.
3.  Arm of Service Marking (The 17pdr Tower would be Royal Artillery (Red over Blue) with a serial of 47).
4.  Divisional Marking.  This is Bellerophon and Pegasus in sky blue on a maroon square

A quick post on the Battlefront forum gave me the information (cheers to R Mark Davies!) I was looking for.

First, the unit markings.  These are usually applied for and aft on the vehicle with a division symbol on the right (looking at the vehicle, front or back) and the Arm of Service marking on the left.    This was courtesy of the chaps on the Battlefront forum (always a handy place to ask a question as there will typically be someone with an answer!).

I painted the circle near the grill  'Yellow' and used thinned 'Black' paint (in fact, old GW Black Ink) to paint the number.

I painted a 'Flat Red' rectangle immediately above a 'Dark Blue' Rectangle to form a two-tone square.  Then, using thinned 'White' paint I painted the serial.

I then mixed the remaining 'Flat Red' and 'Dark Blue' together (adding blue to red in increasing amounts) until I had a satisfactory maroon colour. Using this, I painted a rectangle on the opposite mud guard.
Finally I thinned down some 'Azure' blue and painted a rough representation of the Bellerophon on Pegasus and the H No (a H followed by a few dashes to give the impression of numbers.

The end result looked like this:
P1000825

Finally, I got some gloss varnish and painted the headgear and any exposed arms (particularly on any pointers and pistol wavers!)/magazines etc.  This gives some extra protection on any bits that will pick up damage in use.

This just leaves basing and varnishing and it's all done and on to the next pr!  Catch you next week.

Sunday 24 October 2010

Steel and Flesh! (plus some fabrics...)

Another week, another update!

I've spent the last six days doing all the semi-fine detail.  This consists of:

  • Webbing
  • Firearms
  • Flesh Areas (faces and hands

plus, on paratroops, the maroon beret.

Webbing
British webbing is a tricky subject.  The basic webbing was supplied in one of two colours (Sand or Khaki) and troops then used a substance called Blanco to stain and waterproof the canvas.  As such, the webbing can vary from a 'buff' colour to a pale green depending on how well it was 'blancod' and how weather beaten its got since.  There is some decent information here.

I tend to paint British webbing 'green grey' but for this unit I've experimented with painting daysacks and some pouches Khaki.  The basic technique is the same either way and it's only the three colours that are used that vary.  As always, I tend to thin the paints down by about 30%-50% (best practice with Vallejo) and use a GW 'Standard' Brush

Firstly, a shading colour is laid down on the webbing areas.  I use 'Green Brown' for Khaki areas and 'Russian Uniform' for the green grey regions.  A little care needs to be taken here as its easy to ruin the smocks or trousers with a missed stroke.  Getting paint onto the entrenchment tool, canteen or weapons isn't too bad as we have still to paint them yet.
P1000788
Shade Colours on

It should also be noted that Binoculars and Grenades were painted at this point.  Shade: 'Reflective Green', Base: 'Russian Uniform', Highlight: 'Green Grey'.  It's quite convenient to paint them at the same time as the webbing point as the pallet is mostly the same after the 'Reflective Green'.

Once that's applied, I then add the base colour;'Khaki' or 'Green Grey' keeping the shade colour showing in the recceses, under flaps or near where the webbing/sling/sack joins the rest of the model.  The black wash alter will help of the shade does get covered too much, but it does give a better gradient if its visible to an extent.
P1000798
Base Colours on

Finally, the highlight is applied to edges and raised areas of the webbing.  'German Camo. Beige' highlights Khaki and 'Stone Grey' highlights 'Green Grey'.
P1000802
P1000803
Two views after Highlights on

Once done, any tie straps are painted stone grey.  Later I apply a thinned 'Black Wash' in the recesses, edges and around the tie straps.  More on that later.

Woodwork
Woodwork is probably a poor description as I also paint the Canteen (brown-ish) and lay the base work down for the flesh areas, but the main aim is to paint the entrenching tool handle and the 'furniture'/stocks of the firearms.  Battlefront have depicted the Paratroops with Sten MkV so have wooden butts and foregrips rather than the all metal MkII/III the line infantry normally have.

Firstly, I used this opportunity to 'black out' the boots, canteen and Sten.  The SMLE was left mostly in the 'English Uniform' base coat from earlier as it has only a few metallic parts on display.  The 'blzck' was left to the magazine, bolt, butt plate and fore group instead.
I should point out that normally I do this after the initial undercoating of the model and just touch it up at this point.  For some reason I missed it earlier.
DSC05034
Blackout!

Once dry, 'German Camo.Medium Brown' is painted on the furniture of the weapon, the entrenching tool handle and the canteen.  It's worth finding some decent pictures of the firearms to make sure your painting the right bits; a google image search is often sufficient!  With the canteen and handle, avoid getting any paint on the surrounding webbing to save any need for touch ups later.
DSC05035
Shade coat on the wood/canteen

Next, 'Beige Brown' is applied over the 'German Camo Medium Brown' of the weapon and entrenchment tool handle.  NOT THE CANTEEN.  Leave the darker brown showing in the recces, especially on the SMLE.  
At the same time, carefully pant the 'Beige Brown' onto the flesh areas to provide a shade coat for later.

I usually then mix some 'Iraqi Sand' with the 'Beige Brown' (50:50) for a final highlight on the wood areas.
DSC05037
Flesh Shaded and Woodwork finished

The last step is to paint 'US Field Drab' onto the canteens as a broad highlight.  I don't tend to highlight the canteens beyond this but adding a bit of 'Khaki Grey' to the drab would do the trick should anyone want to go to that level.
DSC05038
Canteens at the ready

Fleshtones
The last stage provided a shade coat for the flesh so now its time to build it up.  I use a method detailed in Wargames Illustrated 263 that I find I prefer over my old one which always looked far too pink.

A base coat of 'Medium Fleshtone' is painted over the 'Beige Brown', leaving the latter in the shadows (eye sockets, ear canals, major folds) of the skin.
DSC05041
Medium Fleshtone

Next, 'Flat Flesh' is applied as a highlight to the nose, brow and other raised areas.  Later I apply black wash to add further contract.  Looking back on the model, I think it needs another coat of 'Flat Flesh' as the highlight does not appear to be strong enough here.
DSC05043
Flat Flesh

Metallics
[insert heavy metal joke here]
With the wood work of the weapon painted its time to turn my attention to the 'worky bits' of the gun, plus other metal areas such as the canteen water cap!  I also apply this to the breech of the Pack Howitzer

Firstly, a 50:50 mix of  'German Grey' and 'Gunmetal Grey' is applied over the metal areas, leaving 'black' in the deepest recesses.
DSC05043
Shade Coat on Sten and Pistol

Next, bolt gun metal is applied as a broad highlight.  I finally add a fine highlight of 'Oily Steel'.
P1000815
Base and Highlight on Sten and Pistol

P1000817
Fished Metallics on SMLE (Truck passengers) and Radiator Cap

P1000818
Finished Metallics on Pack Howitzer Breech and Pole

Final Wash
With all of the above elements painted, it's time for the black wash that I've been mentioning.  This is applied in much the same way as the mixed 'Brown/Black' wash mentioned earlier.  Vallejo 'Black wash' is thinned and carefully applied to the face, firearm and the webbing.  I also apply a bit the collar and shoulder straps to break them away from the rest of the smock.
 I try and avoid a liberal soak and use careful applications to avoid pooling and darkening the model too much.  The aim here is to add some final definition to the model.
After all these washes the model can look a bit shiny.  A good coat of matt varnish will fix that and is always my last step on the project.  Stick with it till then.

Beret
A distinctive feature of the British Paratroop, and something I've always struggled to get looking right, the maroon beret of the airborne divisions earned then the 'Red Devil' name.
On previous units, I've always got this looking far too red.  This time I feel I got a lot closer.
Firstly, the beret receives a shade coat of 'Flat Brown'
P1000820

Next, Cavalry Brown is applied over this, leaving the previous shade in the recesses.
P1000822

Finally, a highlight of 'German Camo, Pale Brown' is applied wherever the light seems to catch on the beret (typically around the rim with a few creases on the top.
P1000823

So, that's a week's worth of work (well, a few hours each day anyway)!  But what's left?
At this point there is still the following to do:
  • Insignia and markings (shell markings on the gun crew, unit markings on the truck, maybe para wings on the arms)
  • Bases
  • Some final detail (dare I do eyes???)
Should be all done by the next post then!  See ya later.