
Just a quick update. I had started writing this entry a few weeks ago to kill time on a business trip. Finally got around to finishing it off now. I had made a start on the hedges for the tournament but I've had some difficulty getting a straight cut and need some fatherly assistance. sadly he's still in Devon on his holidays...
A few years ago, BF used to put a tank crewman in with each tank and these were great little figures, generally either a wounded crewman clutching his arm or a more... pro-active one clutching a sub-machine gun like he's going to hunt down the ATG that just brewed him up. The German's also got a pretty neat one of one crewman dragging a dazed comrade forward. At some point BF stopped putting them in the Blister which was annoying but I had managed to build quite a stock pile of Brit and German ones anyway, with a few given by other guys in the club who didn't use them.
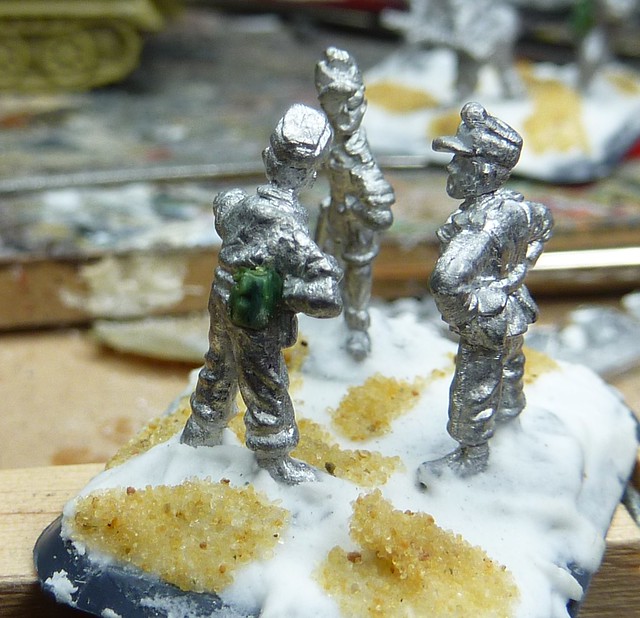
Now, I typically use them to show a tank is baled/bogged by sticking one on a penny (I used to try and get a full crew onto a small base) and I have used one as the basis for a tank commander previously, but I was running short of DAK figures to finish off my command bases and I thought, "why not just use some of the SMG armed ones?"
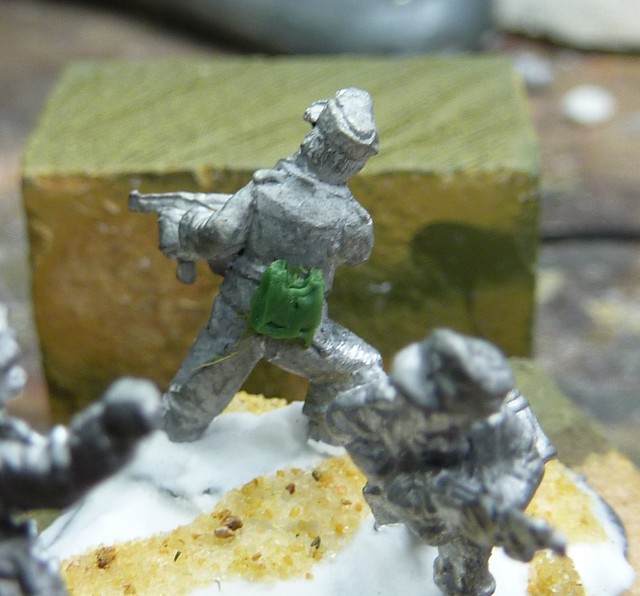
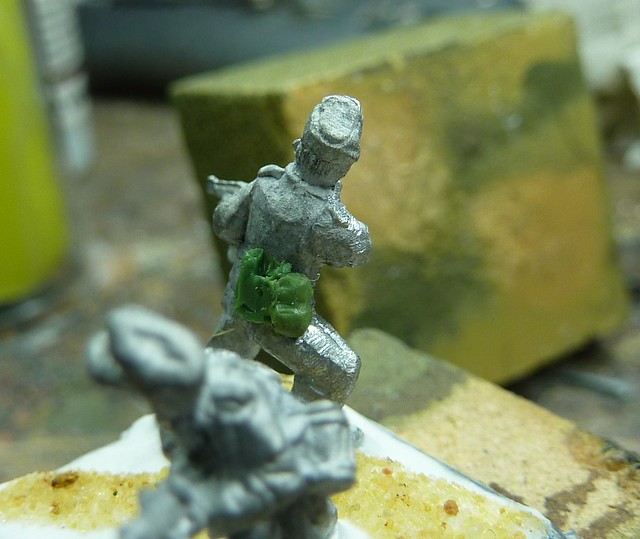
There are two figures that wouldn't look out of place on a DAK base. One has the DAK style peaked soft cap, goggles and shorts with MP40 by his side whilst the other is emptying his SMG towards the enemy. Really, the only thing they really need is some webbing (canteen, maybe the bread bag too) to make them blend in with the infantry/guns they are leading.
I'm no sculpter but I have had a stab at using green stuff in conversions before, such as the aforementioned tank commander.
Compared to that, a canteen and bread bag seemed pretty simple!
Firstly, I looked over some reference material (google searches, looking at other DAK figures) to try and work out how the webbing should look. It's important to get the big detail (relative size, shape, position) right because no amount of fine detail will hide a major boo-boo like getting the canteen stupidly big or on the wrong side!
Here's how it should look:
The next thing is to work out how the sequence. We need to work outwards with the greenstuff so its Bread Bag, then Canteen, then the strap of the canteen that holds the cup on (the metal cup of the canteen will just be a simple line break on the canteen shape).
Next, I knock up some green stuff into a 50:50 ratio. I recall an old White Dwarf article saying to use half of what you think you need and it has always seemed good advice; I always seem to mix too much, even then.
No doubt modern White Dwarf would tell you to mix three times as much as you think you need!
The bread bag is fairly simple to do. I roll out some green stuff onto a wet tile (greenstuff doesn't stick well to wet things. So keep blades and fingers damp!) and, using an existing model as a reference, cut out a thick rectangle of about the right size for a bread bag.
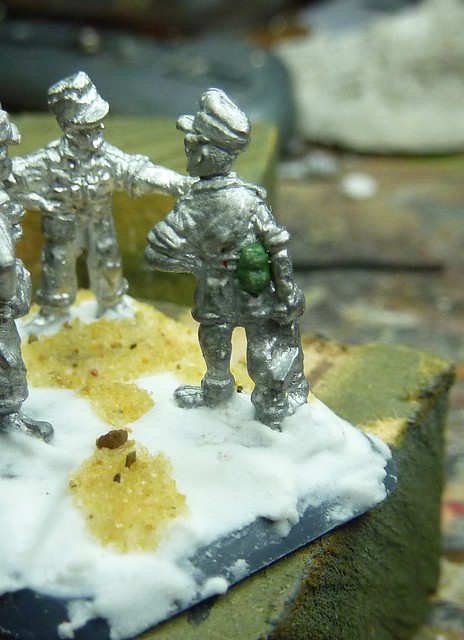
Now, using a wet blade, lift the rectangle off the pallet and place on the right rear side of the model (again, worth checking a reference when doing it). I let it sit for about half an hour to partly cure then used a sculpting tool to remove the material between where the belt loops sit, add an indent around the edge to represent the breadbag's front and add two indents for the buckles.
 |
| Not modelled - Bread |
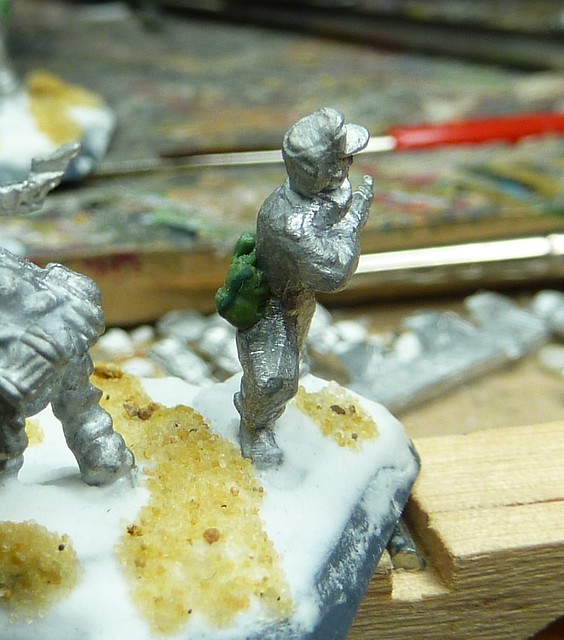
Next I worked on the canteens. I mixed up some more green stuff and formed it into a tear drop size about the size of the canteen (including cup). This was placed over the breadbag (if present) and allowed to sit for about thirty minutes. I then flattened the top down to square off the cup and indented a line to show where the cup meets the canteen.
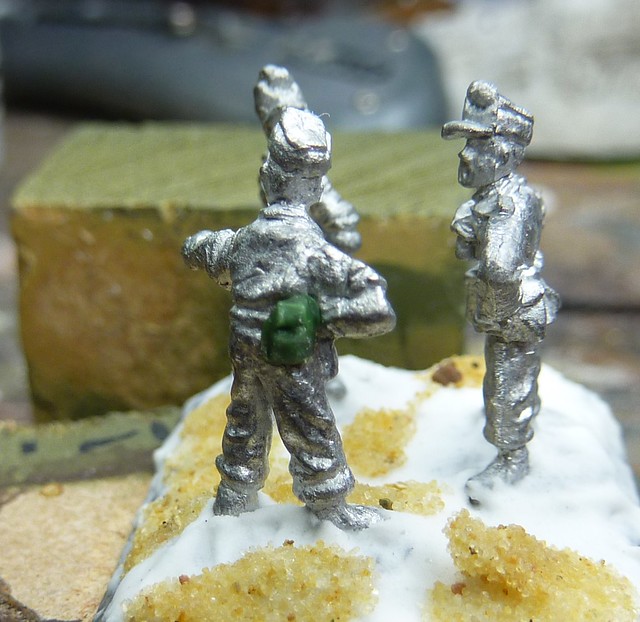
I left that to cure fully and pondered the next step. I needed a strap to join the canteen to the cap/cup. However, after a few attempts I had to admit that such a fine strap was just out of my ability. Thankfully I spotted a post by one of my fellow Brighton Warlords, Ade over at Restless Wargamer. He had been playing around with a GW product called liquid greenstuff with great effect. Luke at Onslaught Games had some in stock so, on a whim, I grabbed a bottle.
It's pretty neat stuff. It can be picked up by brush and can then be cleaned off in water with little impact to the brush afterwards. It seems to be aimed at patching up finecast models but I decided to experiment and tried "painting on" the strap, like painting a fine line. This seemed to go well, but wasn't quite as defined as much as I wanted. Once it cured, I painted on another layer and this seemed to do the trick. Once it cured, I cut the strap square at the bottom and did some mild filing to get the strap flat but otherwise it required very little work.
So there we go, some relatively simple greenstuffing converts spare tank crews into interesting alternative DAK infantry/commander.