
I'd already use one of Heroics and Ros' FV105 Sultan CVR(T) Command vehicles (catalogue number BM17) for a HQ stand.
 |
| HQ in Sultan. All figures H&R |
 |
| Damn right that's '68 Pattern DPM in 6mm |
I had one left to use on the CO stand. I'm basing the CO on a larger 30mm x 30mm base so there's a bit of white space and I also wanted the Co to be distinctive from the HQ. The H&R model has the "Tent CVR(T))" modelled on the back of the Sultan all rolled up. It seemed easy enough to saw that off and then (not so easy) model up a deployed tent.
Research
Initially, this was something of a pig. None of the books I have have the damn thing photographed with the tent deployed. The web was also tricky. "Sultan" gets a lot of Ottomans. "Sultan CVR(T)" starts getting the goods but, whilst showing a few with tents rolled off (apparently most Sultan's have had the tents removed in recent years), the only shot was of a computer model for a Battlefield 2 mod. Now, from previous experience 'Reality Mods' can be a hit and miss affair as a source. The tent looked about what I expected it to look but I'd still rather find a photo.Thankfully, "Tent CVR(T)" actually got what I was looking for. It's all about how you search for it!
The crusader80 website had a good variety of photos with the Sultan and its tent in view. The main features to replicate seemed to be:
- Height same as vehicle with slight peak
- Width same as vehicle, slight flare out at bottom
- Length about a 1/3 of the vehicle (or slightly shorter than the box bit of the body)
- Canvas roll window each side
- Canvas roll door at end.
Chop Shop
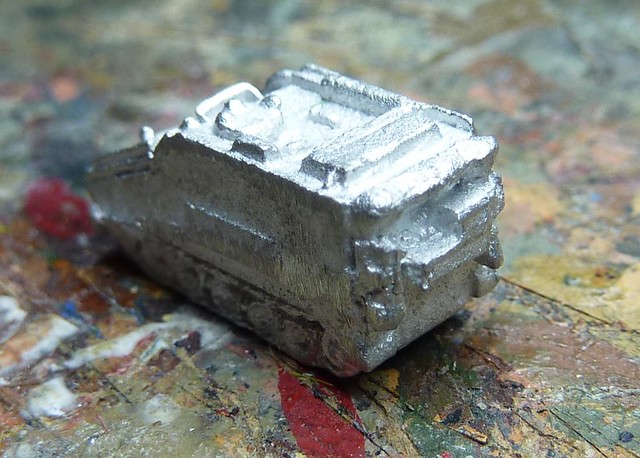
So this is what I started with:
A pair of side cutters removed the majority of the rear with little subtly or trouble. After that, a Dremel with a sanding head removed what little was left.
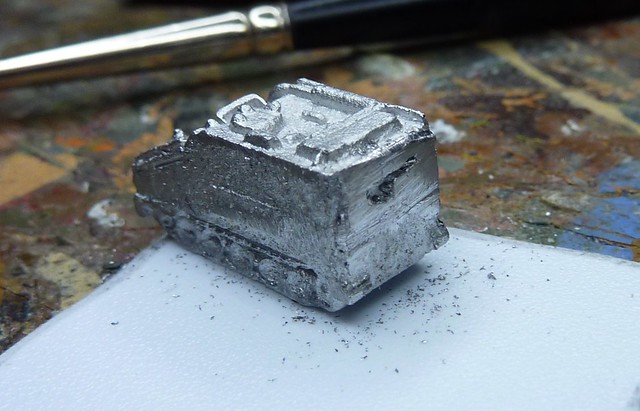
Brutal, ugly work but thankfully it will be well out of view.
Putting Up The Tent Poles
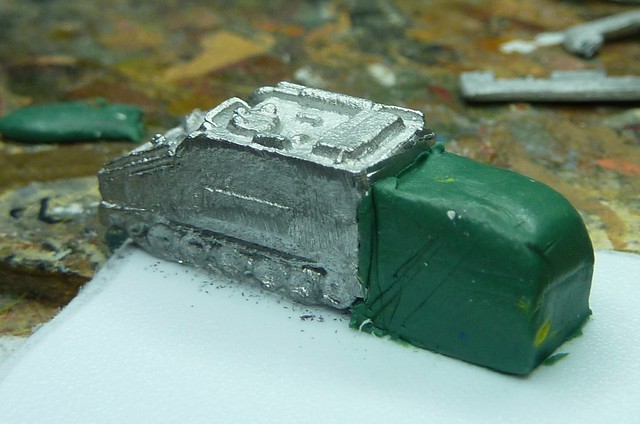
I decided very quickly that this tent was not going to be hollow with a modelled interior. A somewhat cowardly move but I find it important to know one's limitations! Instead I mixed up some green stuff into a rough block of approximately correct proportions and slightly undersize. This would be used to drape the 'fabric over'. I did this a couple weeks ago and got on with some 6mm Infantry so that it'd be solid by the time I got back round to it.
Fabric Nationale
I did the tent in a few stages, sadly not realising toll later than I ahd not paused to take enough photos.
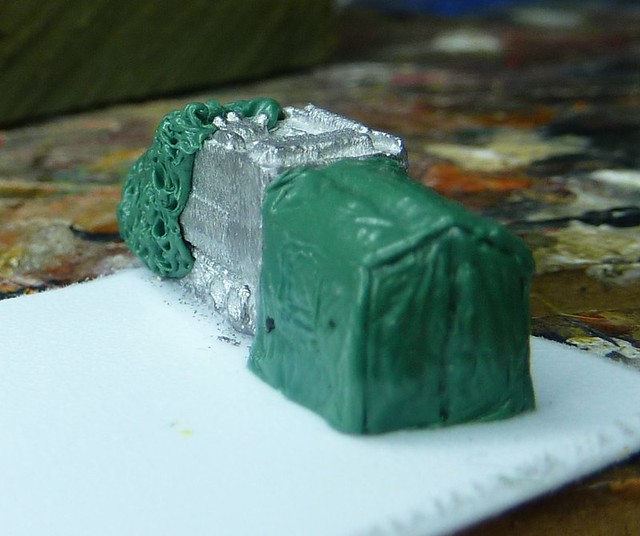
The first stage was the two sides. I picked up some more green stuff and carefully pressed it flat onto a wet tile. The tile is smooth and non-porous so the green stuff struggles to stick to it, especially if the tile is wet.
I then made sure my Stanley knife had a fresh blade. A scalpel would be easier to wield but I'm fresh out of blades at the moment. Wetting the blade to stop the green stuff sticking, I cut out a rectangle slightly larger than the side. I then carefully picked this up with the edge of the blade and laid it on the existing block.
I repeated the process on the other side and on the roof (having first used some green stuff to form a peak on the block). I then used a pick to add some crease lines (always emanating from a corner) and very carefully scribed in a window shape in each side.

I left this to cure for 30 minutes so that putting on the rear of the tent wouldn't undo my handy work so far.
At about this point I realised I had more mixed green stuff that I'd probably need, having ignored my own rule of mixing up half as much as I thought I needed (you'd be surprised how well it works as a Rule of Thumb).
What's a boy to do with some rapidly curing and slightly toxic modelling putty?
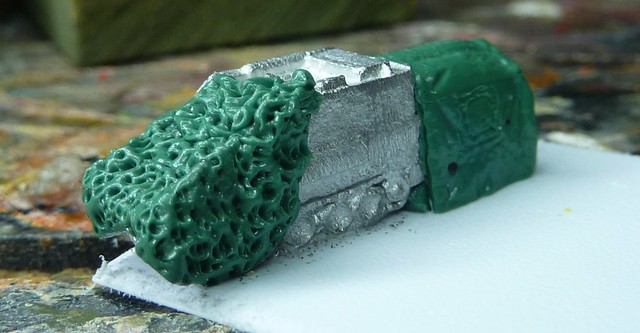
Camouflage Netting
Camouflage Netting is horrible stuff. It has a wonderful ability to get tangled on itself and is semi-sentient, able to find and snag itself on every nook and cranny of whatever it is draped over. It does do a fairly good job of breaking a silhouette up though.
So far I have avoided netting up the 6mm models. This is partly from a desire to get them painted quickly and partly to make doing Mighty Miniatures Reviews easier. Seeming as I was now the proud owner of a lump of curing Green Stuff and had time to kill, I set about green stuffing the Sultan and a Scimitar which will also be on the base. I adopted the tried and trusted approach to green stuff camo netting which is to put a rough square or triangle onto the body and then jab it to death with a wet pick!
 |
| Good thing he's not going anywhere. I covered the driver position! |
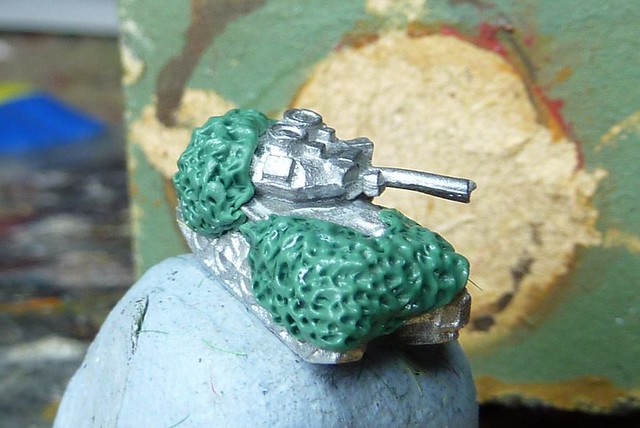 |
| Not even Camo can hide how bad the Skytrex Scorpion is |
Anyway, back to the tent
Rear Entry Point
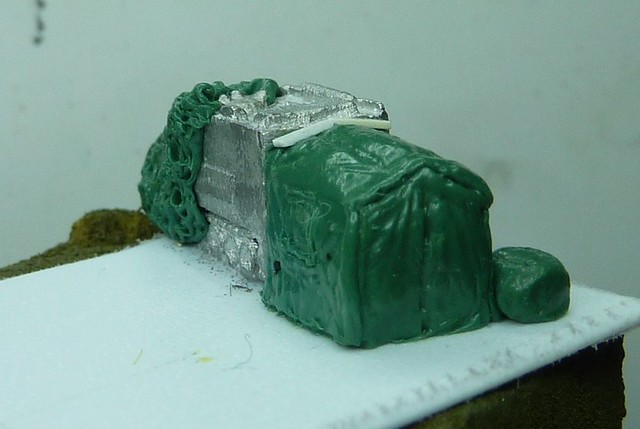
So, we had one side of the tent still to do, the rear. At this pint I still hand't decided whether I was going to model it closed or 'open' (albeit onto a black painted block). I eventually decided to leave it closed for the sake of getting the job done. I had already left a 'sheet' of green stuff of more or less the right size which I dropped into place. As with the other sides, I used a wet pick to add creases and a central split for the opening.
Finally, I used the thinnest plasti-card I had to add the metal work that overlaps the tent. It's hard to give an inspirational speech about stopping the red menace when the rain's dripping right down your back!
I also used the last bit of green stuff to make a block that I'll paint up as a generator. It needs filing into a squarer shape but that will have to wait till tomorrow when the green stuff isn't so soft.
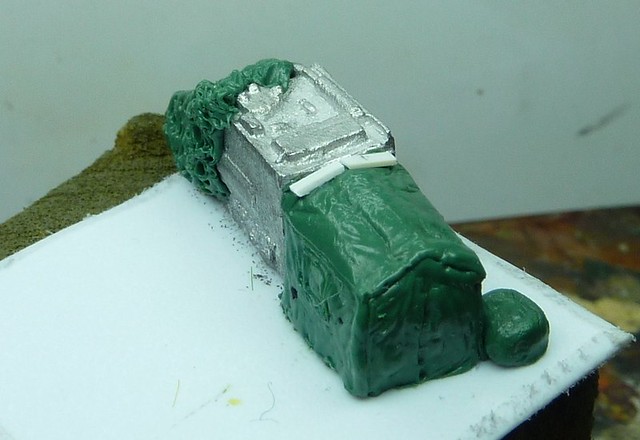
There you go, the beginnings of a Command Stand!
I'm away from computer all of next week so I'll be updating the week after, probably covering either painting DPM (if I can get some decent photos) or just doing a photo trawl of the new vehicles I've painted.
That's a spectacular job. I like the way you did all the detail on the tent. And it's 6mm! Awesome stuff.
ReplyDeleteCheers. It's come out a little lopsided but that isn't entirely unlike the real thing!
ReplyDelete