
Okay, maybe not.
Anyway, welcome back. Sorry there was no update last week, work proved suitably distracting (I ate my way around Texas). Burp!
Anyway, back in blowy blighty now and attention is focused on getting some desert terrain done and out onto the playing fields. I need to clear the deck to focus on hedges!
"Hellfire and Back" added a new terrain feature to the desert game, the Escarpment. A geological fault, running along the battlefield, occasionally cut through by rough worn paths down the tall cliff faces but, otherwise, providing a serious obstacle to the armoured forces that dominate the sand battlefields.
Now Battlefront have released a model for this feature and its... okay. But its one of those terrain features that I look at and go, "hmmm... sod it! I'll do it myself!"
So, basically there are three elements to this terrain piece that are common to all my terrain pieces:
- A hardboard or MDF base, chamfered by hand (and carpenters rasp) so as to blend in the terrain to the table.
- Polystyrene body, shaped by hand (well, bread knife and sand paper).
- Two coats of PVA and sand to form a semi-hard shell.
Well, this time I cheated a bit!
Firstly, I treated myself to a new Jigsaw in the sales. It can be set to cut at 45° angles which makes doing the chamfered cuts so much easier.
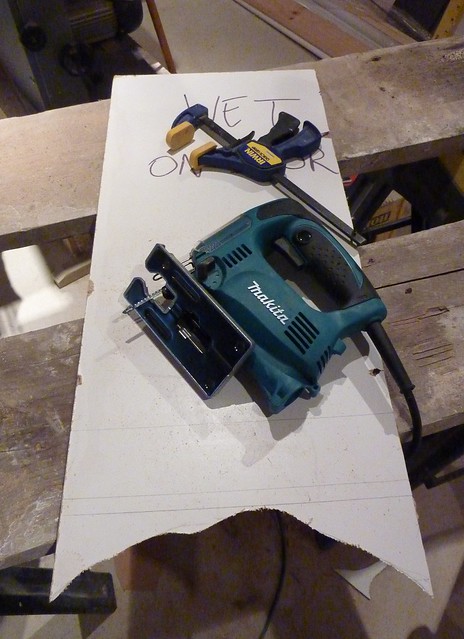 |
| Behold! Power Tools! |
Just mark out a shape. I went for a semi-crescent (mixing between full foot and half foot variants), the curved side being the flow into the desert, the straight-ish edge being the cliff, leaving a FOW large base-sized edge at each end so that the path can be clearly distinguished. No matter what shape, I always ended the line at these points. My intention is to create 'large base sized' markers to reflect the different track types the random generator can throw up (narrow path, rock slide, etc)
Then, simply cut out, with the jigsaw doing all the hard work. No need to chamfer with a rasp!
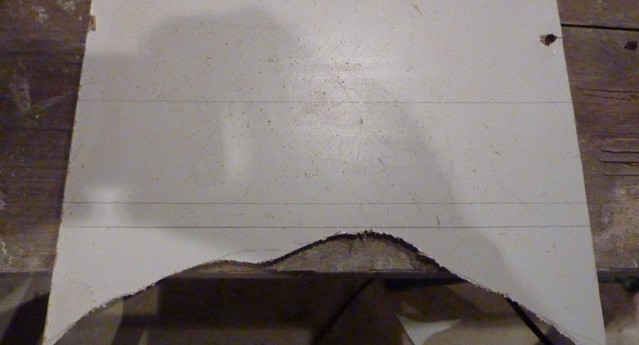 |
| In this picture: parallel lines... |
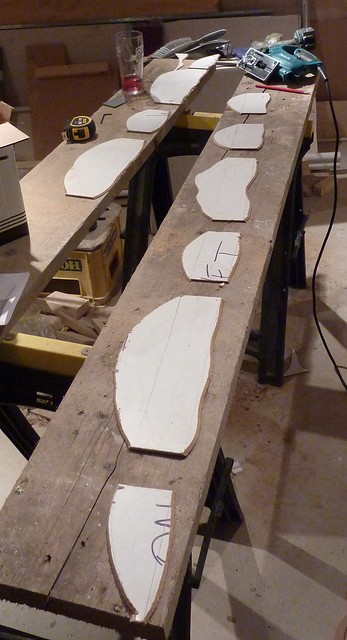 |
| I got a little carried away considering this is just for a 6 x 4" board... |
Okay, next the polystyrene. I had made a set of escarpments before, long before BF made them cool! But I based them on a set I had seen in Egypt and they were a bit tall (four or five times the height of a Sherman), with a huge footprint and tended to dominate the table far too much (plus, no paths to get through!). Sometimes reality is not your friend.
With these ones, I wanted to make something a bit more game friendly so I used a 20mm think polystyrene in a single layer. Time to introduce my next tool, a hot wire (or resistance) cutter!
Needless to say, the initial shaping of the hills became a lot less time consuming. First I cut the basic shape by drawing around the hardboard base.
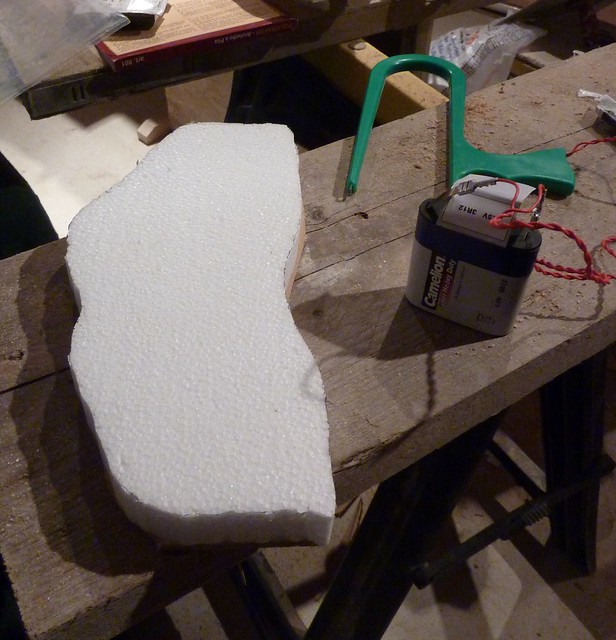 |
| Powered Tools! |
I then stick the shape onto the base using PVA and leave overnight.
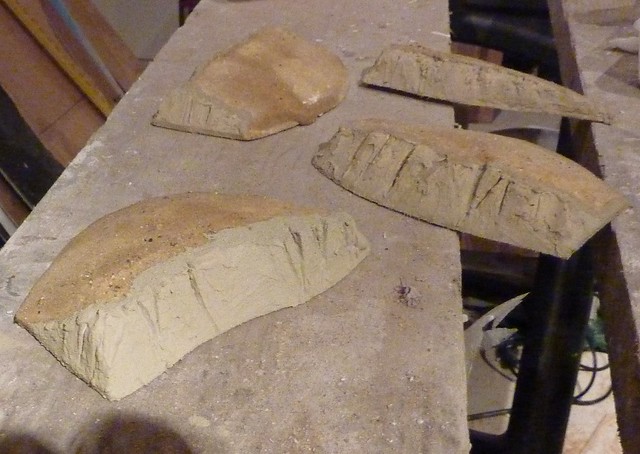
Next, I used the cutter to 'scrape' off layers of polystyrene to cut the gentle curve back to 'sea level' on the back-end. Then I use the cutter to cut 'rain channels' and other erosion marks into the cliff face. That leaves us something like this.
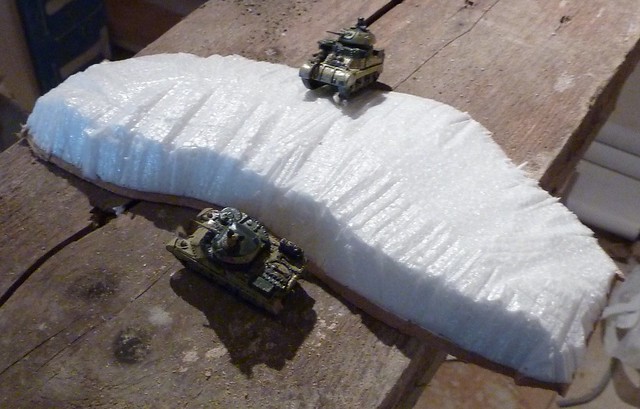 |
| Grant 1 is just about to carry out a "death from above" attack on Grant 2 |
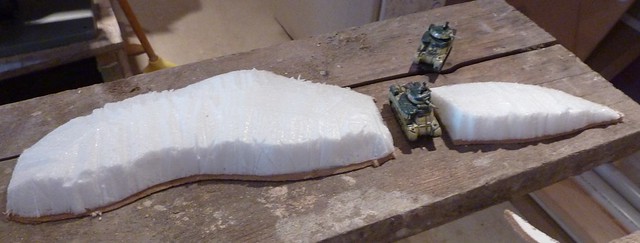 |
| Straight through 118! |
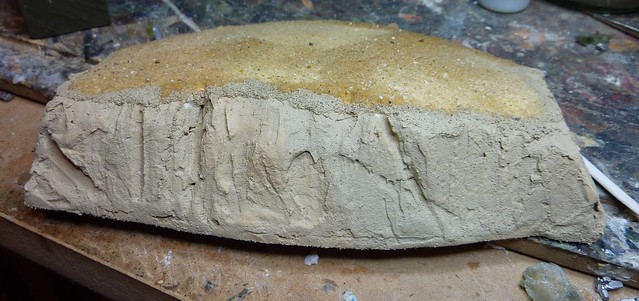
So far, so groovy. I next applied a watered down PVA mix (50:50 ratio) to seal the polystyrene. This needs to be left overnight to dry for best results
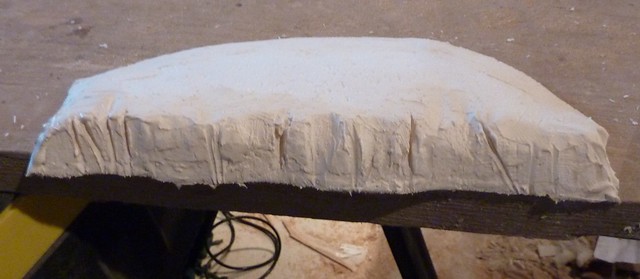 |
| Gritty and rugged - just like me! |
 |
| I had quite an excess... |
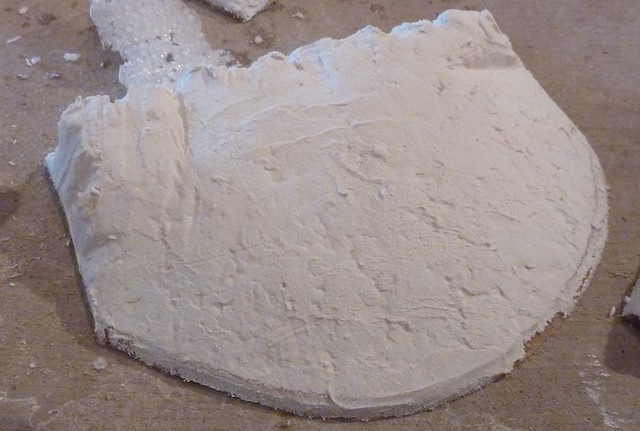
With that dry, I applied neat PVA glue to the curved side then covered it in kiln-dried paving sand. I brushed off the excess but repeated the procedure each time the PVA started soaking through. Once that stopped, I left it overnight to dry.
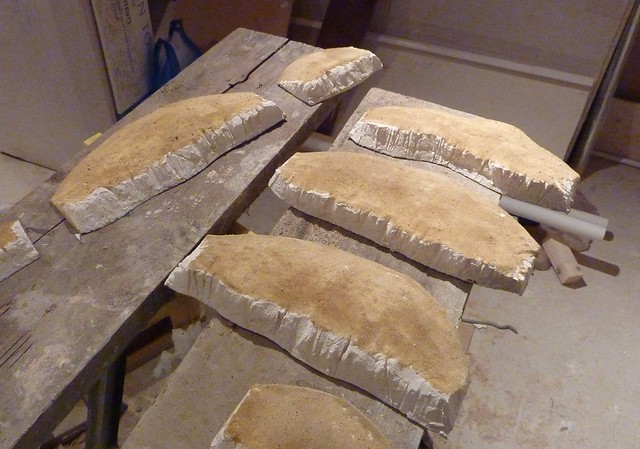 |
| Starting to look the part |
 |
| A selection of escarpments for your pleasure |
 Hopefully there will be some 'finished' pictures inj next weeks update!
Enjoy!
Oooh lardy dar, a makita jigsaw! I'm just jealous, back to my wickes own. :)
ReplyDelete