
Since last post I've been working on the fine detail. This is the stuff that isn't really necessary but tends to give the model some character if you do bother with it. For the Para Artillery this includes:
- Para Wings on the Beret
- Rank markings (NCO only)
- Shell and Case markings
The 15CWT also have serial numbers and unit markings applied.
Lets look at the cap badges first. The paratroop wings look like this:
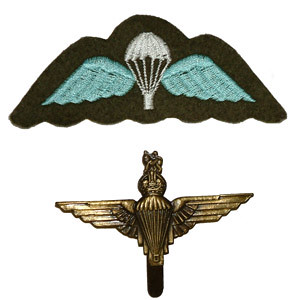
Breaking the shape down its a triangle with a line down the middle. That is more than adequate for the purposes of painting it at 15mm! I painted this shape, first in very thinned down 'Black' then in 'Pale Grey Blue', just above the left eye on every figure with a beret. Its important to get the paint thinned as it will flow better. In a counter-intuitive way, its also better to NOT use a fine brush as it doesn't hold the paint well; nor let it flow. You just tend to get a blob at the end of the bristles. I use a GW Standard Brush as it holds the paint and allows it to flow down the tip.
At the same time I painted the NCO stripes on the arms. This involved a similar process with 'German Camo Medium Brown' being laid down over 'Black' with 'Stone Grey' going on over the top. I usually paint a single stripe rather than doing proper two/three stripes as doing the correct number of stripes tends to make for oversized markings. Some painters can pull the brush control off for doing it so its worth doing a practice run and work out your own limitations.
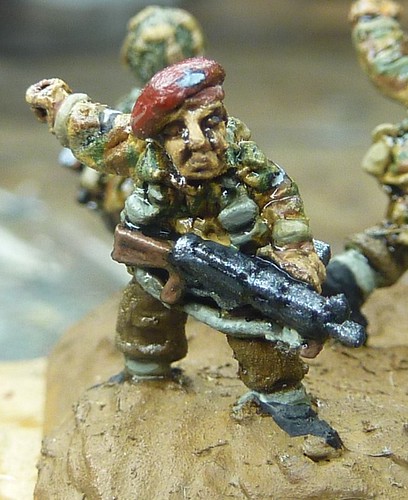
This is the model after these two stages:
Next, I painted some markings on the shell and ammo boxes. Armoured Acorn has some good resources on ammo used by the British Empire, including the lend lease supplies. I looked at the entry for the 75mm round used by the Sherman and assumed that the M1A1 Pack Howitzer would be similar.
First I painted the casing 'Brass' and the shell 'Black'. The shell then got a base colour of 'German Grey' followed by a 'London Grey' highlight. I then gave the shell and casing a quick 'Black Wash'.
Using thinned black paint I painted a black line on the casing (to denote its charge - no idea if its appropriate but it makes the casing interesting) and used thinned down yellow to paint some squiggly lines denoting text. Finally I paint the fuze cap 'Gunmetal' with a small blob of 'Oily Steel' right at the tip.
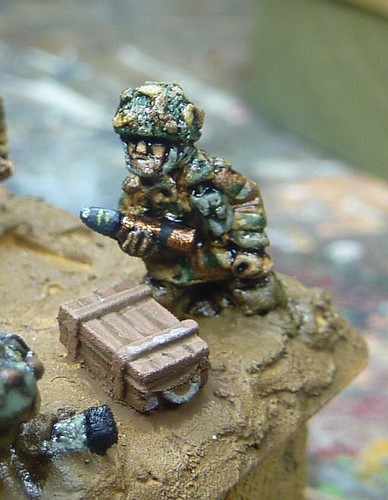
Note the white squiggles and blocks on the box, taken from the reference sheet. I also painted the rope handles 'Stone Grey'. I did a similar thing on the 15CWT, but using the 17pdr Reference sheet for guidance.
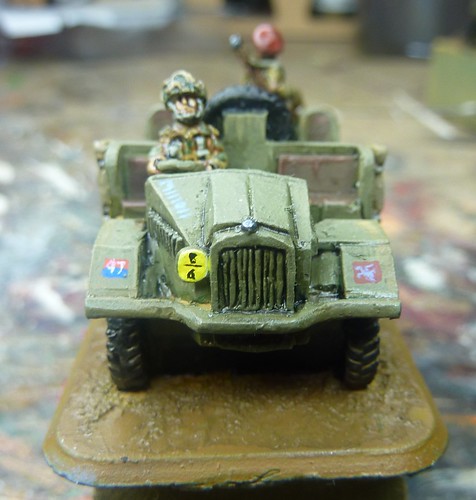
Talking of the 15CWT, this also received some fine detail. Each vehicle in a formation would have a few common markings:
1. Bridge Weight markings (yellow circle with one or two black numbers, typically placed over one of the driving lights). A Morris Truck would have 8/6 (laden and unladen categories).
2. War Office number (T for Tanks, M for utility vehicles, H for Gun Towers). These were painted white typically but seem to be sky blue on colour photos of airborne jeeps.
3. Arm of Service Marking (The 17pdr Tower would be Royal Artillery (Red over Blue) with a serial of 47).
4. Divisional Marking. This is Bellerophon and Pegasus in sky blue on a maroon square
A quick post on the Battlefront forum gave me the information (cheers to R Mark Davies!) I was looking for.
First, the unit markings. These are usually applied for and aft on the vehicle with a division symbol on the right (looking at the vehicle, front or back) and the Arm of Service marking on the left. This was courtesy of the chaps on the Battlefront forum (always a handy place to ask a question as there will typically be someone with an answer!).
I painted the circle near the grill 'Yellow' and used thinned 'Black' paint (in fact, old GW Black Ink) to paint the number.
I painted a 'Flat Red' rectangle immediately above a 'Dark Blue' Rectangle to form a two-tone square. Then, using thinned 'White' paint I painted the serial.
I then mixed the remaining 'Flat Red' and 'Dark Blue' together (adding blue to red in increasing amounts) until I had a satisfactory maroon colour. Using this, I painted a rectangle on the opposite mud guard.
Finally I thinned down some 'Azure' blue and painted a rough representation of the Bellerophon on Pegasus and the H No (a H followed by a few dashes to give the impression of numbers.
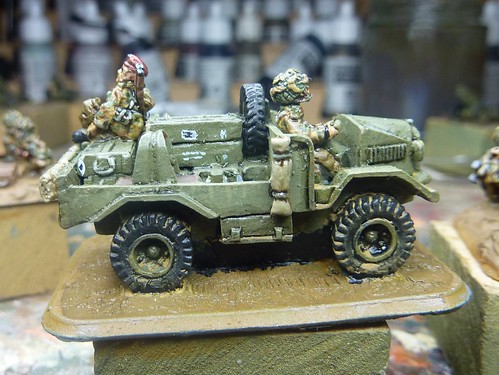
The end result looked like this:
Finally, I got some gloss varnish and painted the headgear and any exposed arms (particularly on any pointers and pistol wavers!)/magazines etc. This gives some extra protection on any bits that will pick up damage in use.
This just leaves basing and varnishing and it's all done and on to the next pr! Catch you next week.
No comments:
Post a Comment