
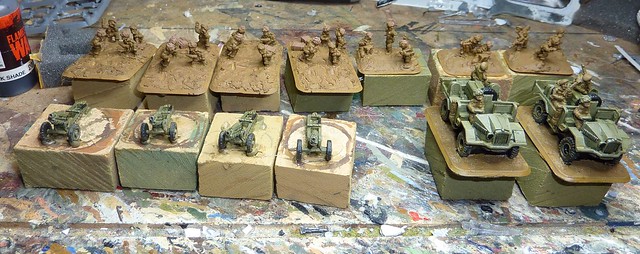
The current occupiers of the painting desk
We join this project part way through. The research was done long ago and the paint jobs are mostly copies of the older models (the first gun troop and the other two trucks) with some refinements, which we'll discuss later.
Prior to this photo, the models have been:
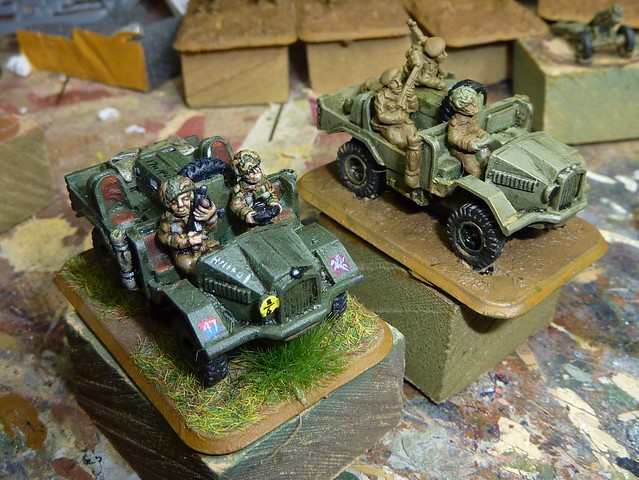
Compare the new truck (with carefully applied wash) to the older truck (with liberally applied ink):
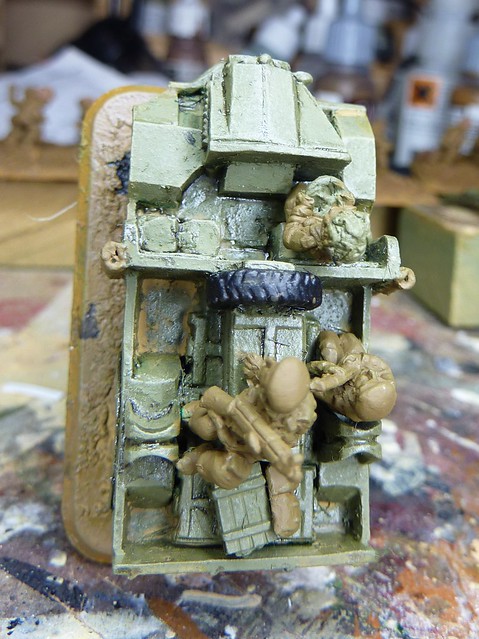
Okay, finally; you can probably see brown 'stains' on the trucks and guns above. This is a technique I use to give the impression of dried, ingrained dirt building up on equipment in the field. It's pretty simple yet effective. Firstly, water down 'US Field Drab' in a 1:4 ratio of paint to water to give something that is slightly thicker than a conventional ink (or very similar to very muddy water!). Now, using a standard sized brush, apply this paint:
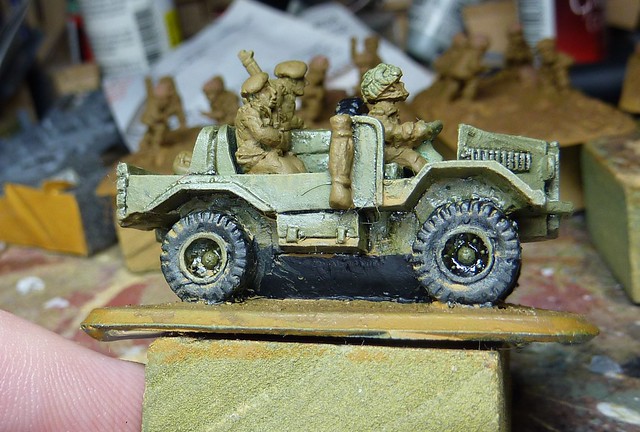
- hot glued to a painting base (some MDF blocks that allow me to paint without directly touching the model),
- sprayed in either ArmyPainter 'Leather Brown' (HQ and Gun Crews) or 'British Armour' (Trucks and Guns)
- the guns and trucks have been painted in watered down Vallejo 'Russian Uniform' to cover any areas where the spray missed. The gun crews were similarly painted in 'English Uniform'.
- Once dry, a 50:50 mix of 'brown' and 'black' Vallejo shade is painted in the areas where I want shading, rather than being liberally applied, and then pure 'blank shade' liberally applied on the undersides.
- Once dry, the guns and trucks have been drybrushed with 'Russian Uniform' then lightly drybrushed with a 50:50 mix of 'Russian Uniform' and 'Green Ochre' to bring out a detail. At this stage I also add thin streaks of this colour to the flat surfaces for dirt streaks and water staining of the body (see below). The truck crews and passengers were then painted in English Uniform so as to match the gun crews.
Compare the new truck (with carefully applied wash) to the older truck (with liberally applied ink):
Finished 'Old' Truck, Left. In progress 'New' Truck, Right.
Now, consider that the only thing different here (other than the fact one is finished) in terms of technique and colours used is that the older trucker was liberally doused in wash and you can see straight away the impact it has had. The new technique makes for a lighter, truer scheme and looks less blotchy to boot!
You can also note that I got the driver position wrong on the first trucks. I blame having just glued a load of Willy Jeeps beforehand for keeping me in a left hand drive mode... :P
You can also note that I got the driver position wrong on the first trucks. I blame having just glued a load of Willy Jeeps beforehand for keeping me in a left hand drive mode... :P
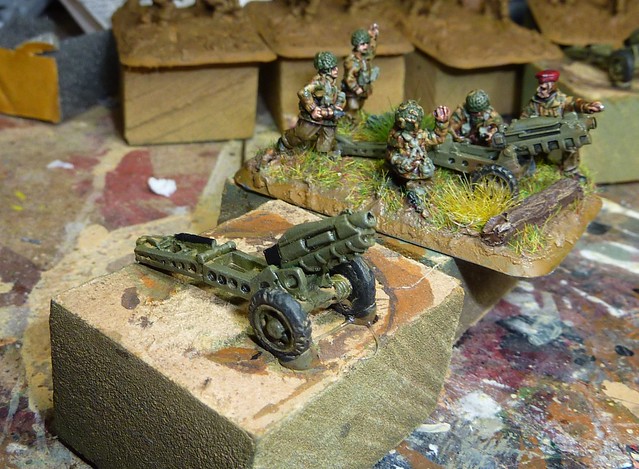
Here's a comparison of the old guns to the new guns. The guns still look fairly dark due to the lack of flat spaces to really allow the technique to shine. It's also a good comaprison of the Skytrex (finished) and Battlefront (unfinished) models!:
New gun (Battlefront), left. Old finished gun (Skytrex), right.
Okay, finally; you can probably see brown 'stains' on the trucks and guns above. This is a technique I use to give the impression of dried, ingrained dirt building up on equipment in the field. It's pretty simple yet effective. Firstly, water down 'US Field Drab' in a 1:4 ratio of paint to water to give something that is slightly thicker than a conventional ink (or very similar to very muddy water!). Now, using a standard sized brush, apply this paint:
- carefully into the corners of crew compartments
- in splotches around areas where crew would put their feet to gain access to a vehicle (engine decks, hatch ways, etc)
- liberally on the bottom half of models, especially inside wheel arches and heavily on the wheels themselves.
Note dirt in crew compartment recesses.
Note dirt around driver's door and underside of vehicle. You can also see the dirt streaks added to the vertical sides
So, that brings everyone up to speed. The next stage will be to paint the gun crew and truck passengers/drivers and this will be covered on the next blog (unless I get distracted).
No comments:
Post a Comment