
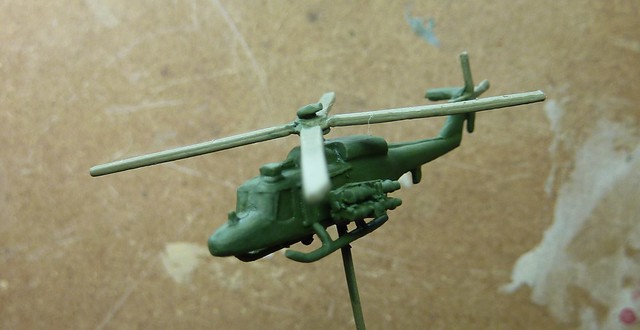
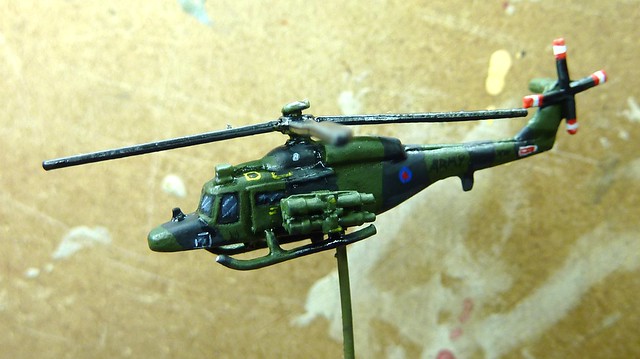
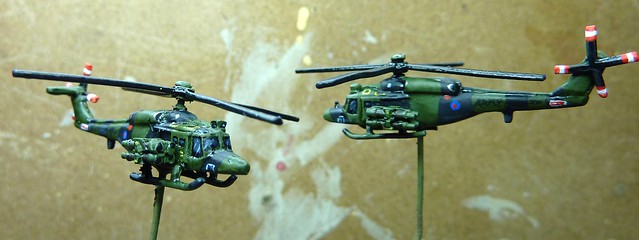
I picked up a pair of Heroic and Ros Lynx AH Mk.1 helicopters (UKMA402). Until the introduction of the rather fearsome Apache gunship in UK service, the Lynx was the main attack helicopter of the Army Air Corps. Whilst nowhere near as well armed or armored as the WAH-64 in use today, the Lynx combined eight TOW anti-tank missiles to a relatively nimble and fast airframe that would be used to help (a little) even the odds in the event of a Russian armored column making a dash for the Channel ports.
Preparation
I'll be writing a detailed review H&R Lynx for Mighty Miniatures soon, but suffice to say that they are nice models for the money. The only real issue was the rather nasty flash.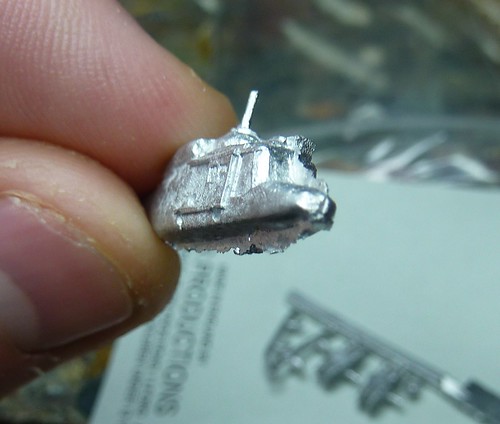
 |
| Up to the normal high standards of post 60's UK Aerospace build quality! |
That took a chunk of time to clear but soon I had both Lynx built up. Unlike the fixed wing aircraft, the H&R helicopters are multi-part models and come with external stores as appropriate. In this case, the Lynx came with two quad TOW launchers each.
 |
| A snip at an SDR friendly £1.50 |
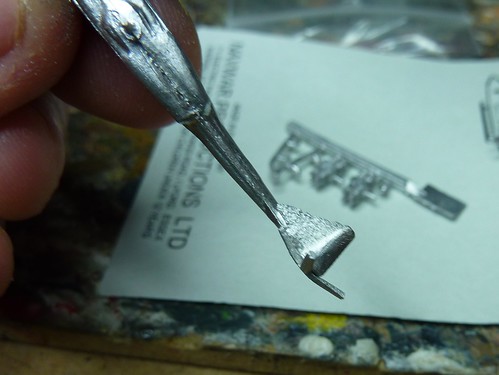
I used a 1mm drill bit fitted to the Dremel to drill a relatively deep hole in the base of the fuselage at what I figured was about the centre of gravity of the model.
 |
| If at first you don't succeed in finding the CoG... You'll bend the rotors. |
I then unfolded a pair of NATO standard paper clips and superglued them in, sticking the remaining free end into a couple wooden blocks. These will act as a handy stand for undercoating and painting so that the flying bases remain paint free.
 |
| Flying High! |
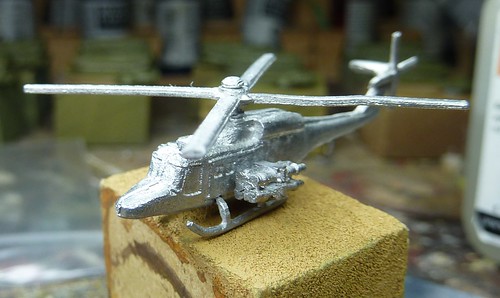
Basecoating and Research
Research so late on in the section? normally its the first section? Yeah...that bit me in the ass. I made my first mistake of the project and sprayed the models Army Painter 'Uniform Grey'. Being used to modern Lynx's in their green and grey scheme I made a rather foolish assumption that they had always been painted that color. Turns out they weren't, as I quickly found out whilst trying to work out what shade the green should be! Apparently, back in the eighties until some point in the early nineties, British army helicopters were painted green and black, like the tanks. Thankfully I found some good period photos (yay for aircraft spotters) scattered around the net. These two in particular proved handy. Photo 1 / Photo 2. The photos gave a good view of markings and the TOW launchers and they would prove useful later.
So, a quick spray of Army Painter/Battlefront's 'British Armour' followed, making the Lynx probably some of my best primed models in the CWC army!
 |
| Needless to say, I'm getting through a bit of 'British Armour' green at the moment! |
Now, British Armour isn't quite right for the shade. The photos made it look less brown/green than that shade and darker to boot. I had a bit of a play around with the shades of green I have and Vallejo 'Reflective Green' seems the closest shade without mixing. That's a bit of a pisser as 'Reflective Green' is a horrid colour to work with. Anyone who uses Vallejo paints is used to spending a minute shaking the paint to unleash the magic but no amount of shaking ever seems to get Reflective Green from being a runny, poorly mixed, mess. In the end I opted for shaking the pot, rubbing the pot in my palms (seriously, this is necceary!) and still had to go with three thin coats when one would normally suffice. I'm still not entirely sure the end result was what I had in mind or worth the effort!
 |
| Not really that reflective |
Wanting to preserve the shade of green as much as possible I decided to forgo the 50:50 mix of Vallejo 'Brown' and 'Black' shades. Instead I used thinned down 'Black' shade on its own, applied all over the model. Once dry, I gave the whole model a heavy drybrush (well, given the runny nature of the paint it was more of a wet brush) of 'Reflective Green' and then a lighter drybrush of a 50:50 mix of 'Reflective Green' and 'Yellow Green'.
 |
| Shaded and Highlighted |
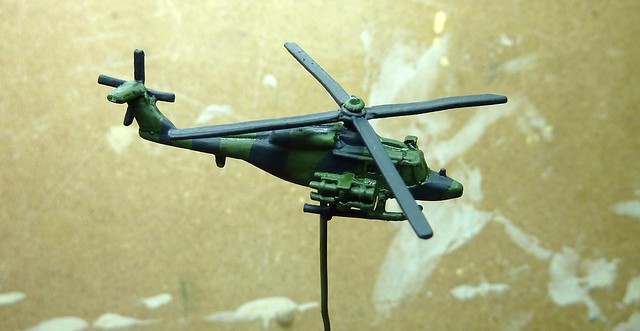
Camouflage
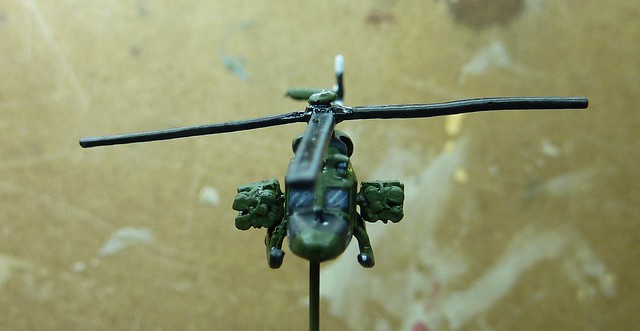
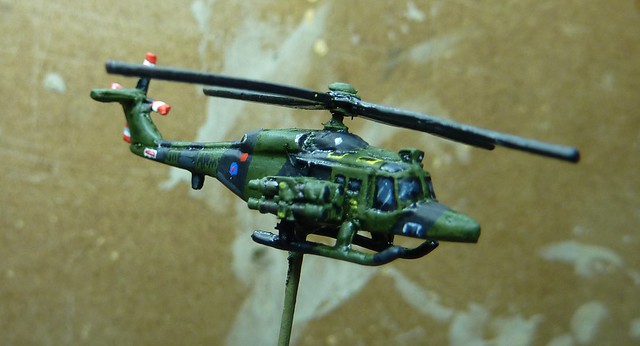
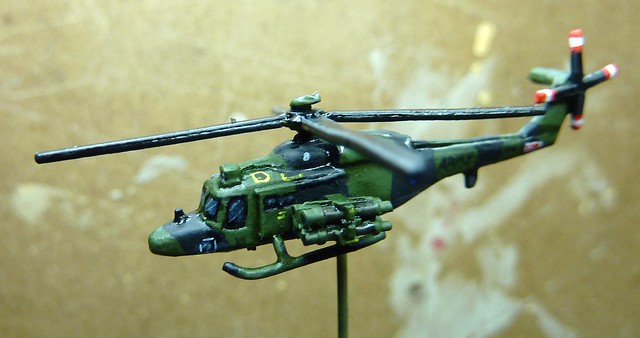
As mentioned, the Lynx were painted in a two tone green and black camo. I painted the black camo much like I had with the tanks, using a 'German Grey'/'Black' mix in a 25:75 ratio to give a 'charcoal' colour that seemed about right for a partly sun faded paint. I also painted the rotors this shade too.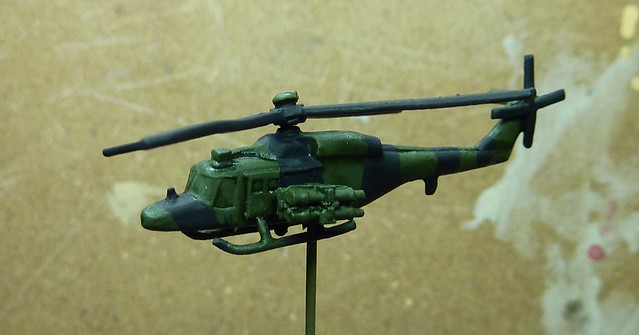
 |
| See! The model does have a right hand side! |
 |
| Maybe too sun faded |
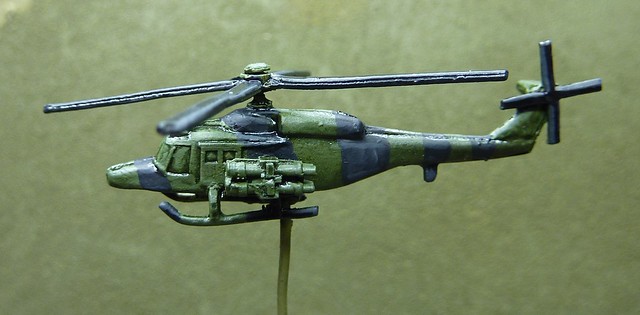
Fine Detail
Well, now the, IMHO, fun bit of the project. Going to town with fine detail.Looking at the photos there were a few things I wanted to make sure the model captured:
- Rotor tip markings
- Engine and blade safety markings
- Roundels and service markings *i.e. "ARMY")
- A decent glazing effect on the canopy and TOW sight.
They were relatively simple to paint. First I painted a 'Deep Yellow' box in each location. I also added a few squiggly lines of 'faux text' to the cabin door and TOW launchers in place of yellow stenciled text that can be seen on the photos.
 |
| Before: A bit of colour on the model! |
 |
| After: Colour eradicated to be replaced by grim dark blackness |
 |
| 'Luftwaffe Uniform' - Not just for 'Herman Goering' division! |
'Next, to give the impression of reflected light, I thinned down some 'White' paint and painted on diagonal lines to the windows. I also used the 'White' paint to start the Tail Rotor markings and the warning sign just below them and the main rotor as well as edge out the painted on Lower hull windows (what would actually be the interior of the cockpit showing through)
I then painted a small circle of Dark Blue on each side of the hull.
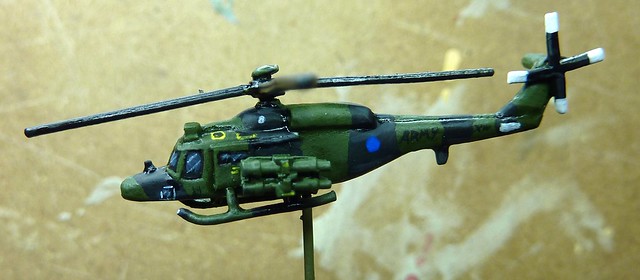
I then used 'Red' paint to add the small red circle to the roundel, a small red rectangle to the Tail boon warning marking, the tips of the tail rotor and a small warning marking just below the engine exhaust.
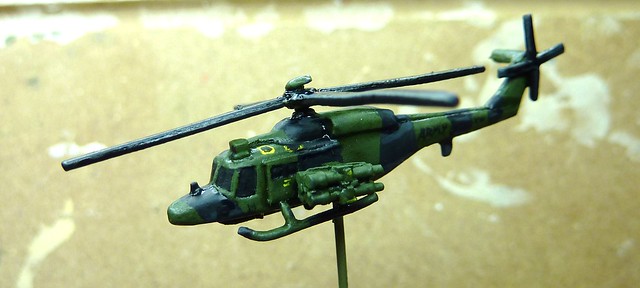
 |
| All but finished! |
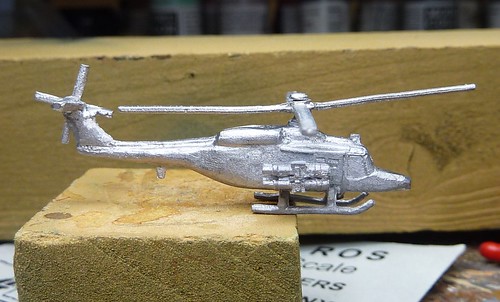
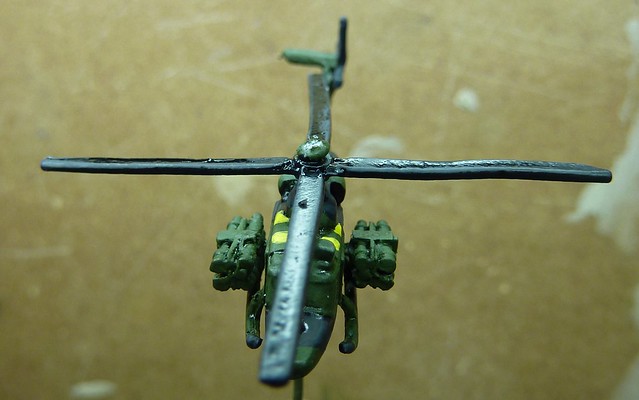
I used 'Gunmetal Grey' to paint on the intake dust shield and the exhaust manifold (both missing from the model).
Finally I applied a thin wash of 'US Field Drab' to the base of the skids and 'US Dark Green' to pick out the TOW missile tubes within the lighter green launcher.. I did ponder the idea of adding some exhaust marks to the hull but couldn't find any evidence to support that this occurred so there wasn't much weathering applied compared to the armour!
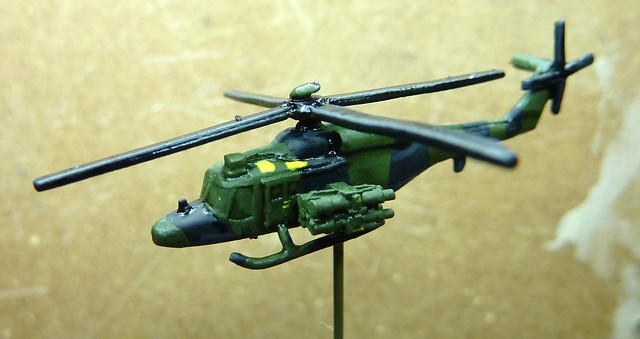
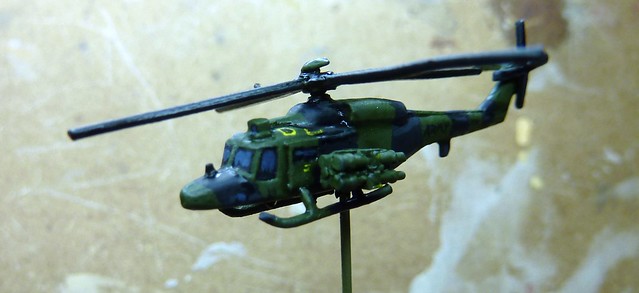
This leaves the Lynx looking like this.

All that's left is to apply some varnish and clip off the paper clip handle, leaving enough to stick into the flying base.
Update - Had a massive failure of the varnish stage. I think I may have rushed putting the second coat on, or maybe it was too humid, but the end result is that the Lynx have gone from the look above to this:
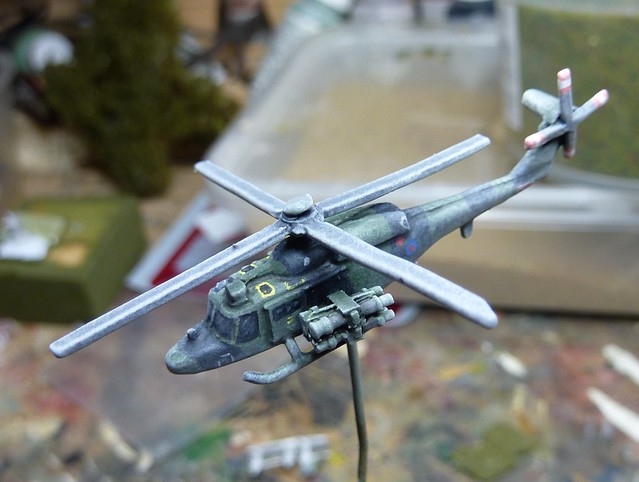 |
| :( |
Those look great, Lee!
ReplyDelete